
There’s something magical about fairy lights—the soft glow instantly transforms any space into a cozy, whimsical haven. Whether you want to brighten up your bedroom, jazz up a corner for a party, or create a dreamy backdrop for photos, DIY fairy light decor is the perfect solution. The best part? You don’t need to be a crafting pro to make your own enchanting designs. Let’s dive into some fun and simple ways to create your very own fairy light magic.
Gather Your Materials
Before we get started, let’s make sure you have everything you need. Depending on your project, materials may vary slightly, but here’s a basic list to get you started:
- Fairy lights: Battery-operated or plug-in, warm white or colored.
- Glass jars or bottles: Perfect for glowing lanterns.
- Wire or string: For hanging lights creatively.
- Clips or tape: To attach lights to walls or surfaces.
- Decorative items (optional): Pinecones, flowers, beads, or paper shapes for extra charm.
Tip: Battery-operated lights are great for areas without easy access to plugs and give more flexibility for creative setups.
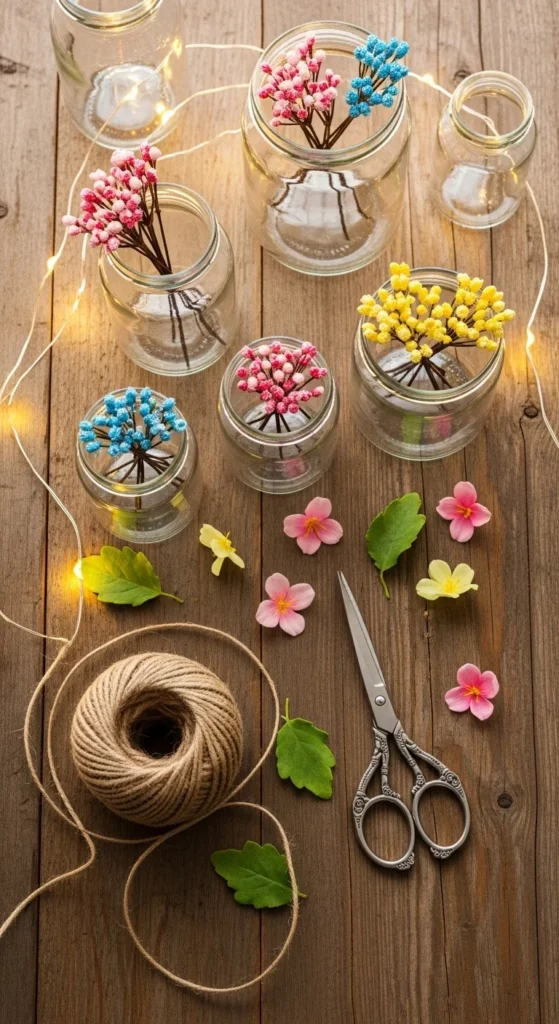
Fairy Light Jar Lanterns
One of the easiest ways to use fairy lights is to turn jars or bottles into magical lanterns.
Steps:
- Clean your jars or bottles thoroughly.
- Insert a string of fairy lights into each jar.
- If desired, add decorative elements like glitter, small flowers, or pebbles at the bottom.
- Close the lid (or leave open for a more casual glow).
- Arrange them on shelves, tables, or along a windowsill.
Pro tip: Use tinted or frosted jars for a softer, dreamier light effect.
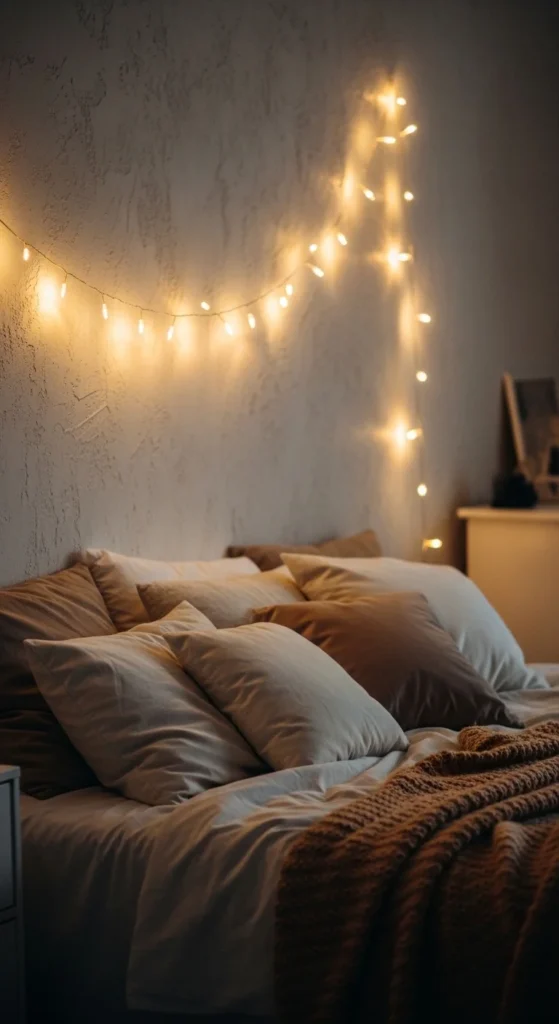
Wall and Headboard Displays
Fairy lights make a stunning backdrop when draped across walls or above a bed. You can create patterns, shapes, or even words with a little imagination.
How to do it:
- Use clear hooks or adhesive clips to secure the lights to the wall.
- Try zigzag patterns, heart shapes, or even a simple drape over the headboard.
- Layer with photos, postcards, or paper stars for a personalized touch.
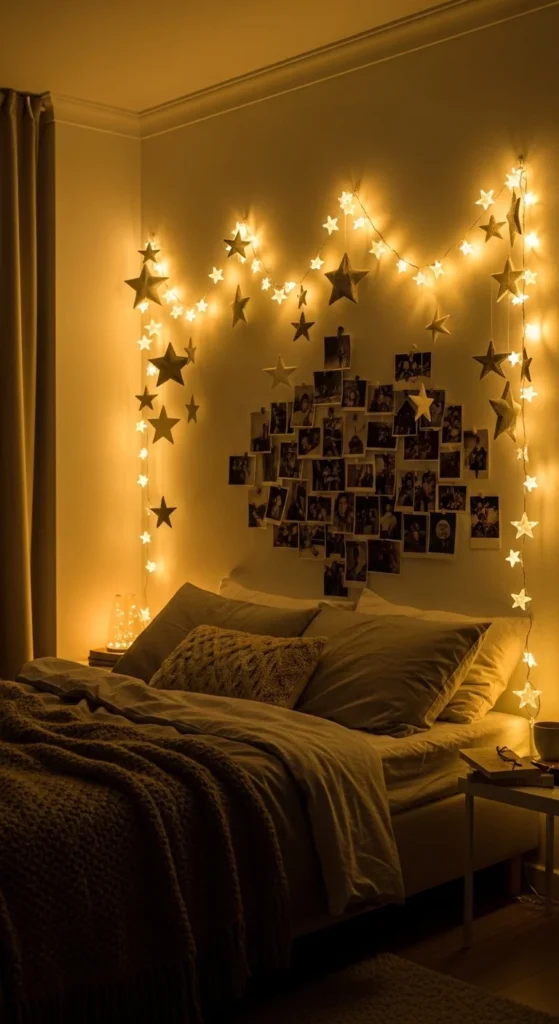
Tip: Make sure your lights don’t touch delicate wall paint for long periods to avoid marks.
Hanging Mason Jar Chandeliers
For a statement piece, transform mason jars into a hanging chandelier of lights.
Steps:
- Attach fairy lights inside each jar.
- Use twine, rope, or chain to hang jars at varying heights.
- Secure each jar to a ceiling hook or sturdy frame.
- Position above a table, reading nook, or outdoor patio for instant charm.
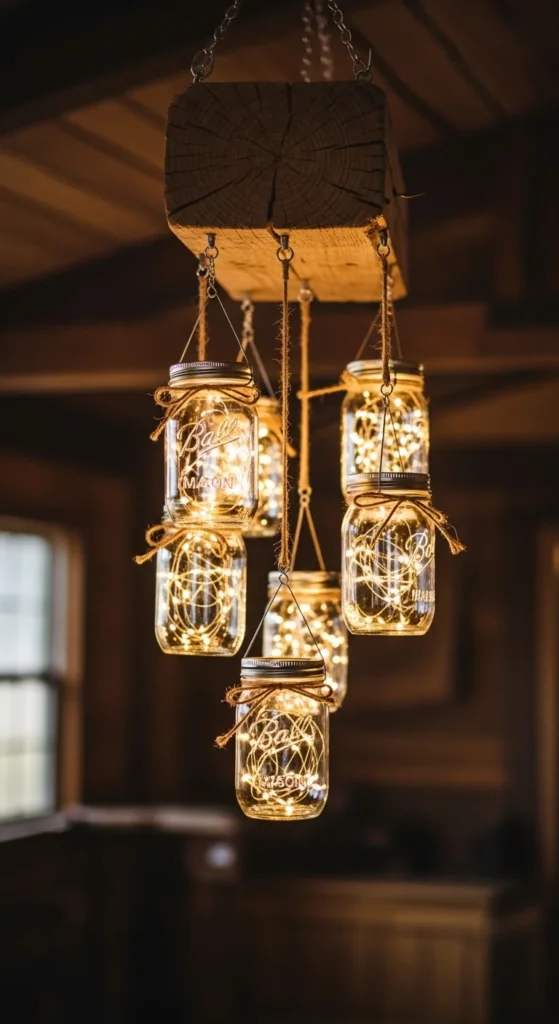
Extra tip: Try adding faux flowers or greenery around the jar lids for a whimsical touch.
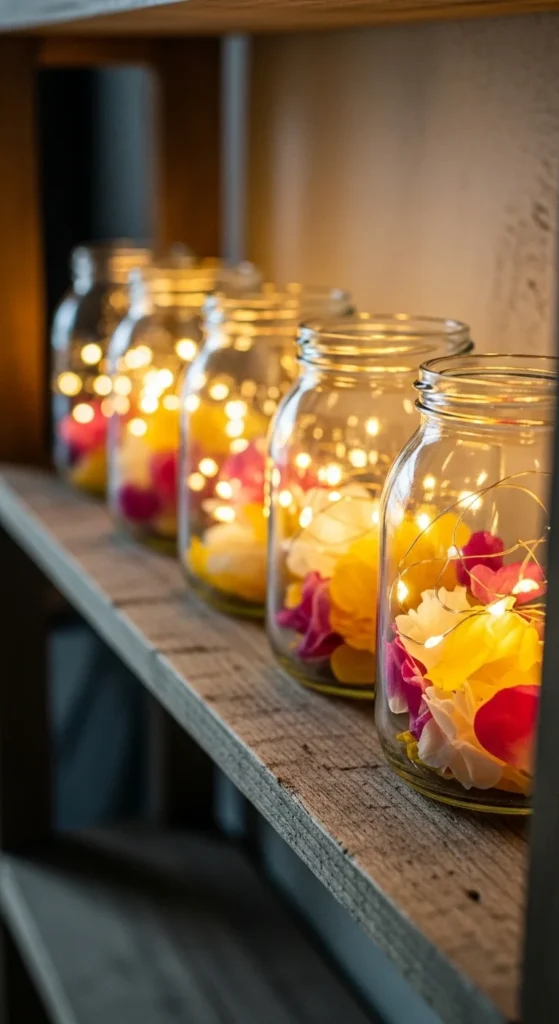
Fairy Light Bottles for Table Decor
Empty bottles are perfect for upcycled DIY projects. They create elegant, glowing centerpieces for tables or shelves.
Steps:
- Collect a few empty glass bottles of different shapes and sizes.
- Clean and dry the bottles thoroughly.
- Insert fairy lights, letting some wire peek out of the top.
- Optionally, decorate bottles with paint, ribbons, or stickers.
- Arrange them as a centerpiece or along a sideboard.
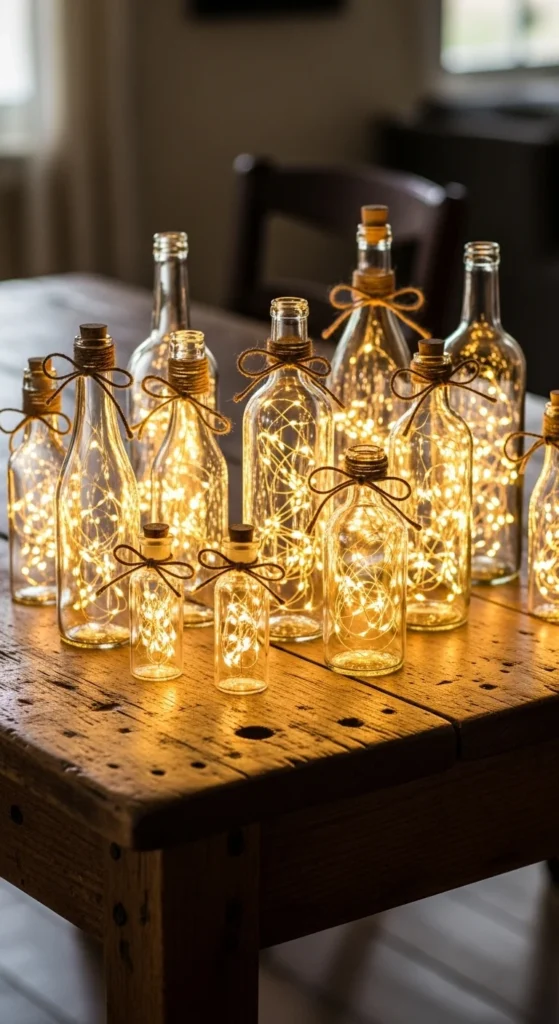
Tip: Colored bottles can add a soft, magical hue to your display.
Final Touches and Tips
- Mix and match jars, bottles, and wall arrangements for a layered look.
- Use warm white lights for cozy vibes, or soft colored lights for a playful atmosphere.
- Battery-operated lights allow you to move your creations anywhere without worrying about outlets.
With a little creativity, these simple ideas can completely transform your home into a fairy-tale-inspired retreat.
Fairy light decor is an easy and inexpensive way to make your space feel magical. Whether it’s glowing jars, wall displays, or bottle centerpieces, the possibilities are endless.
Save this guide for your next crafting day and light up your home with DIY fairy magic!

Leave a Reply