
Do you ever open your drawers or closet and feel like chaos has taken over? From scattered stationery to tangled chargers, clutter can sneak up on the best of us. The good news? You don’t need to spend a fortune on fancy organizers. With a little creativity, common household items can be transformed into stylish, functional DIY organizers.
Whether you’re tackling your workspace, kitchen, or bedroom, these easy DIY organizers will help you declutter while adding a personal touch to your home. Let’s dive in!
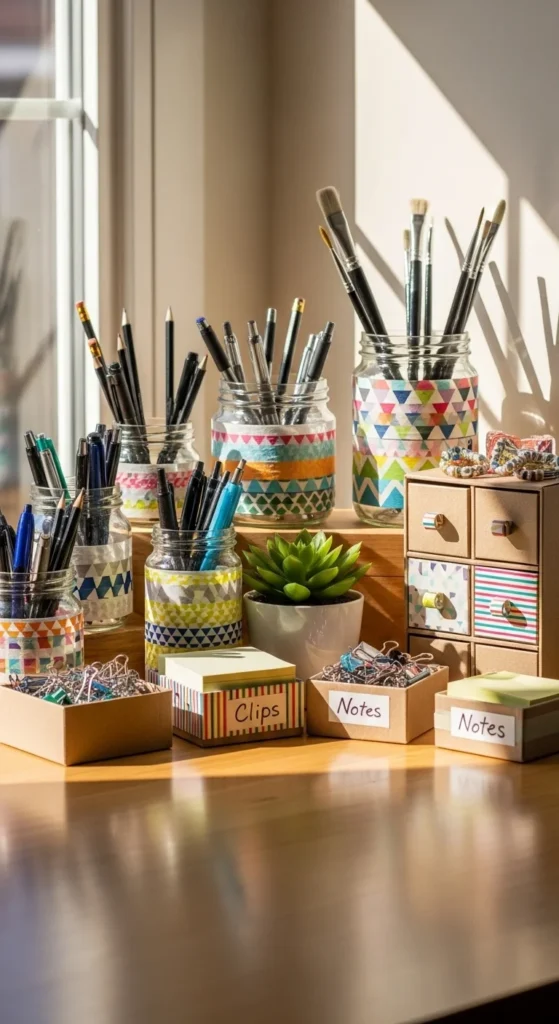
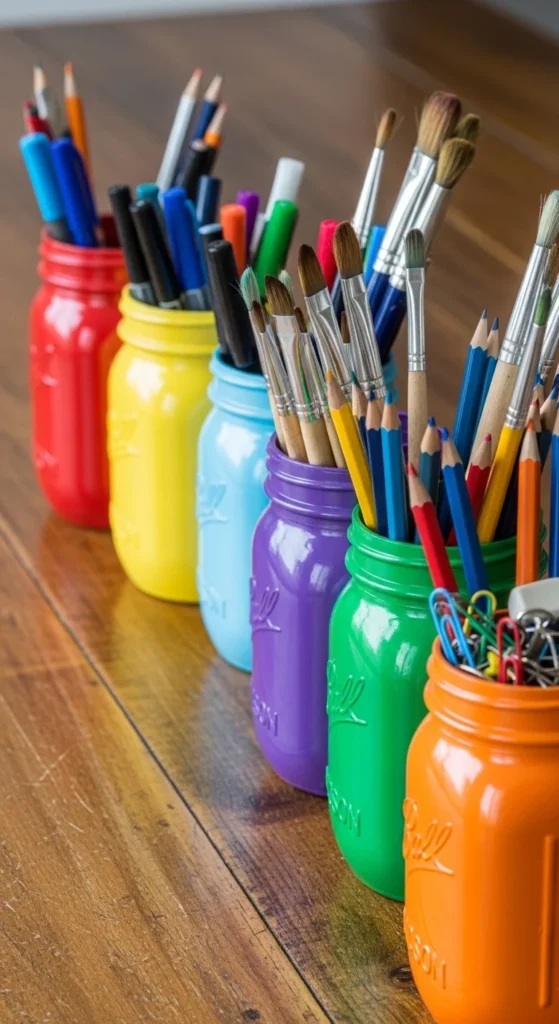
1. Turn Jars into Chic Desk Organizers
Mason jars aren’t just for drinks—they’re perfect for keeping pens, pencils, and craft supplies in order.
How to make:
- Gather jars of different sizes. Clean them thoroughly.
- Paint the jars with acrylic paint or spray paint for a pop of color.
- Wrap with twine, ribbon, or washi tape for added flair.
- Label each jar with its contents using a small chalkboard label or stickers.
Tips:
- Use jars with lids to store small items like paperclips, push pins, or rubber bands.
- Group similar items together in one jar for a cleaner look.
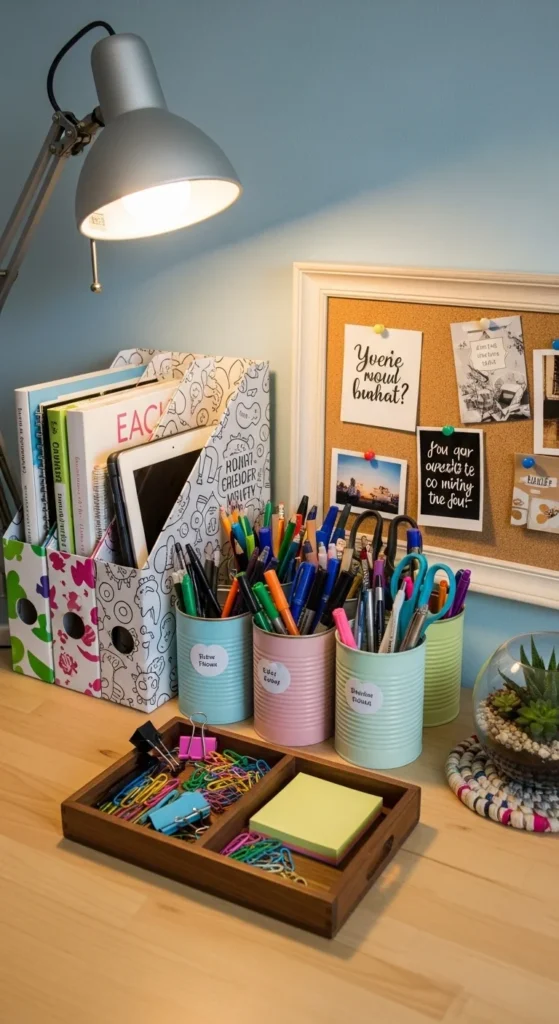
2. Cardboard Box Magic
Don’t toss that old cardboard! With a little cutting and decorating, boxes become versatile organizers.
Steps to create:
- Choose boxes that fit the space you want to organize.
- Cover them with decorative paper, fabric, or contact paper.
- Add dividers inside using leftover cardboard to separate items like socks, utensils, or notebooks.
- Stack or arrange boxes in drawers or on shelves for easy access.
Tips:
- Small boxes work well for jewelry or makeup.
- Larger boxes can organize toys, magazines, or pantry items.
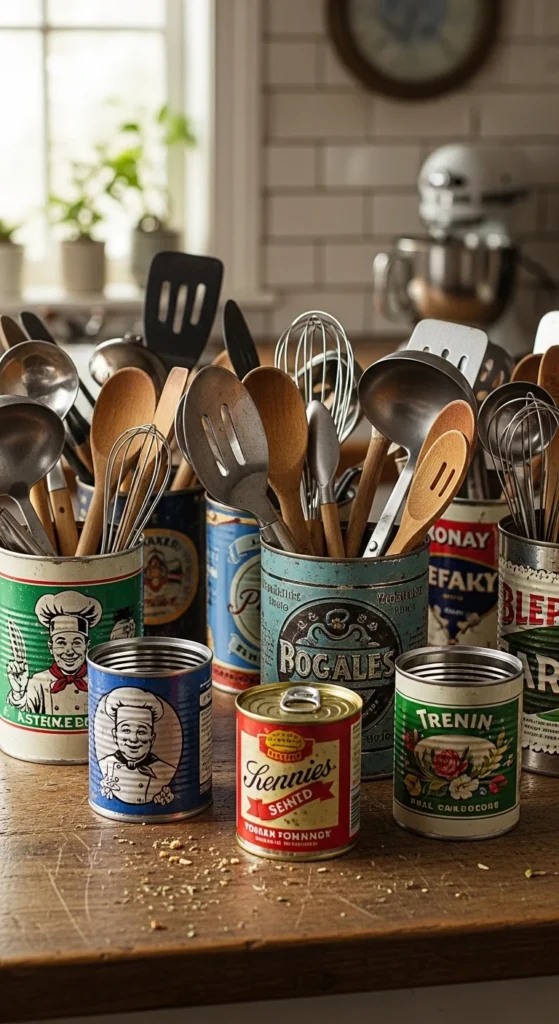
3. Repurpose Old Tins and Containers
Tins, coffee cans, and even oatmeal containers can get a new life as storage solutions.
How to do it:
- Remove labels and wash the containers.
- Paint or cover them with decorative paper.
- Punch holes for a chic hanging organizer, or stack them for countertop storage.
Ideas:
- Use tall tins for kitchen utensils.
- Use small tins for sewing supplies or buttons.
- Attach magnetic strips to the back of tins to create a magnetic wall organizer.
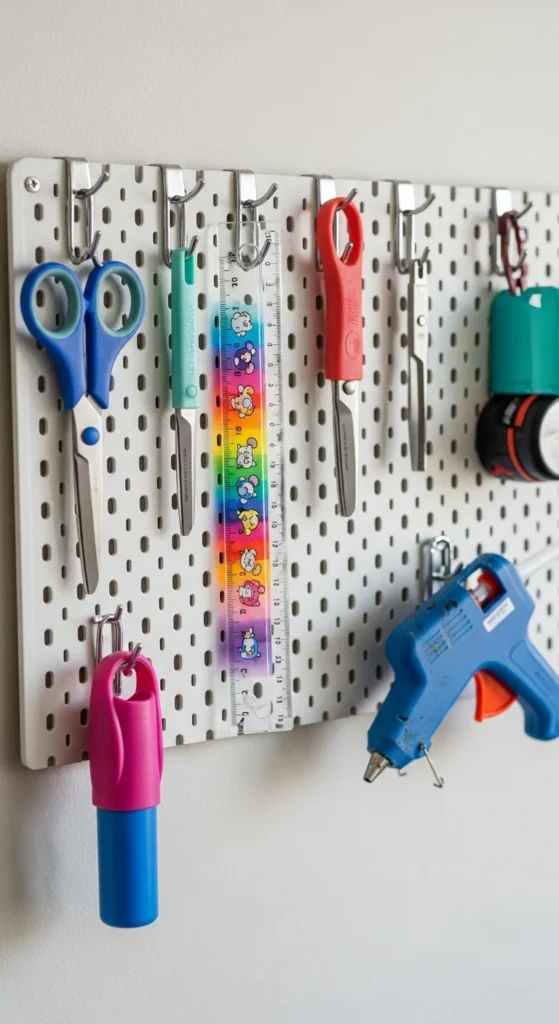
4. Hanging Organizers for Small Spaces
Wall space can be a game-changer when it comes to decluttering. Hanging organizers keep your essentials accessible and visually appealing.
DIY methods:
- Pockets: Sew or glue fabric pockets onto a wooden board or hanger.
- Caddies: Use a pegboard and hooks to hang containers for craft supplies.
- Repurposed items: Old shoe organizers or shower caddies can be painted and repurposed for office or bathroom storage.
Tips:
- Label each pocket or caddy for a clear system.
- Keep frequently used items at eye level for convenience.
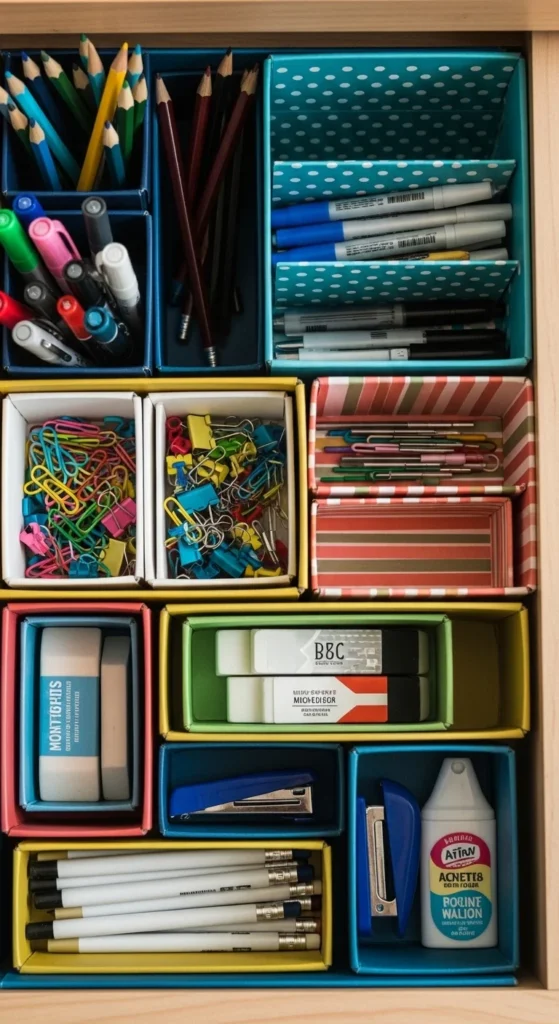
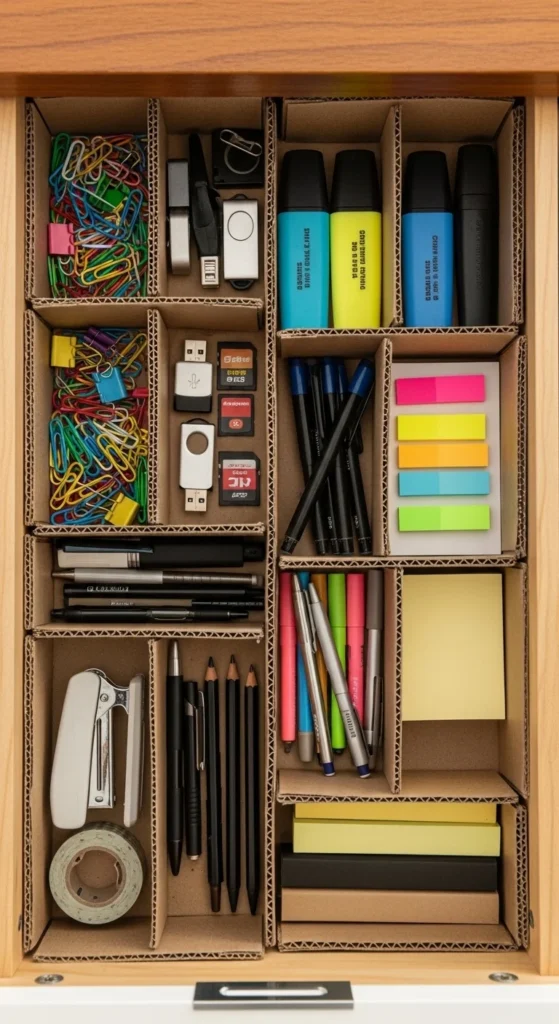
5. Drawer Dividers Made Simple
Drawer dividers keep everything from socks to utensils perfectly separated. Making your own is easier than it seems.
Steps:
- Cut cardboard, foam board, or thin wood into strips that fit your drawer.
- Slide the strips into place to create compartments.
- Cover the dividers with decorative paper or tape for a polished look.
Tips:
- Adjustable dividers work best for drawers with items that change size.
- Pair with small boxes or jars for extra storage within each compartment.
Final Thoughts
DIY organizers are a fantastic way to declutter, personalize your space, and even reuse materials that would otherwise go to waste. From jars to cardboard boxes, the possibilities are endless—and every organizer adds a touch of creativity to your home.
Start small, experiment with materials, and soon you’ll notice a huge difference in how tidy and inviting your space feels.
Save this guide for later and transform your home one DIY organizer at a time!

Leave a Reply