
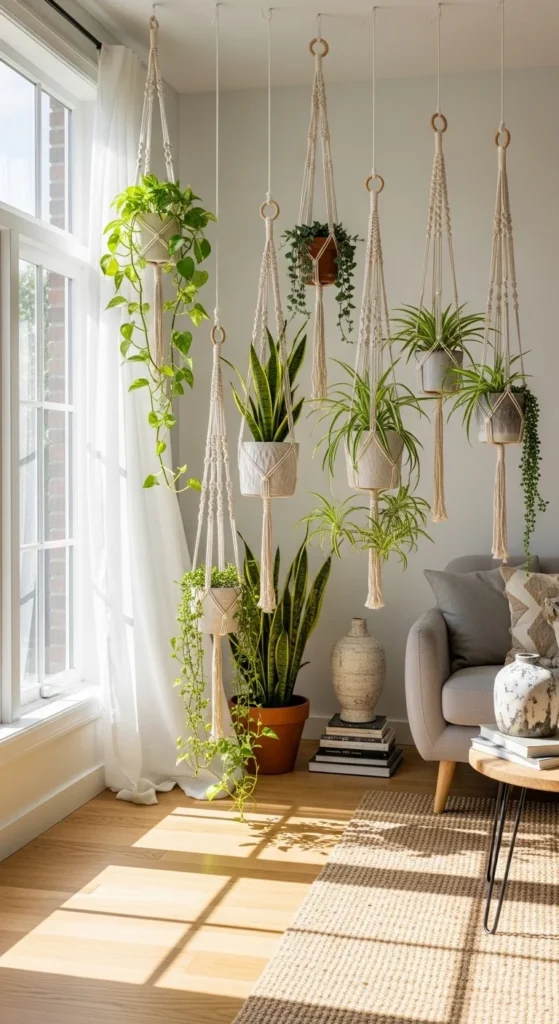
Macrame has been stealing the spotlight in home décor lately, and for good reason. Its boho-chic vibe, natural textures, and handmade charm can instantly elevate any space. The best part? You don’t need to be a crafting wizard to create beautiful pieces. Even beginners can make stunning macrame wall hangings, plant holders, and more with just a few knots and some patience.

Whether you’re looking to add a personal touch to your home or want a creative weekend project, DIY macrame is both relaxing and rewarding. Let’s dive into the essentials and step-by-step guide for beginners.
Getting Started: What You’ll Need
Before tying your first knot, gather some basic supplies. Don’t worry—these are easy to find, even online or at your local craft store.
Materials for Beginners:
- Macrame cord: Cotton cord works best for beginners; start with 3–5 mm thickness.
- Wooden dowel or ring: Perfect for wall hangings or plant holders.
- Scissors: Sharp enough to cut thick cords cleanly.
- Measuring tape: Accuracy matters when cutting cords.
- Optional beads or feathers: For extra decoration and flair.
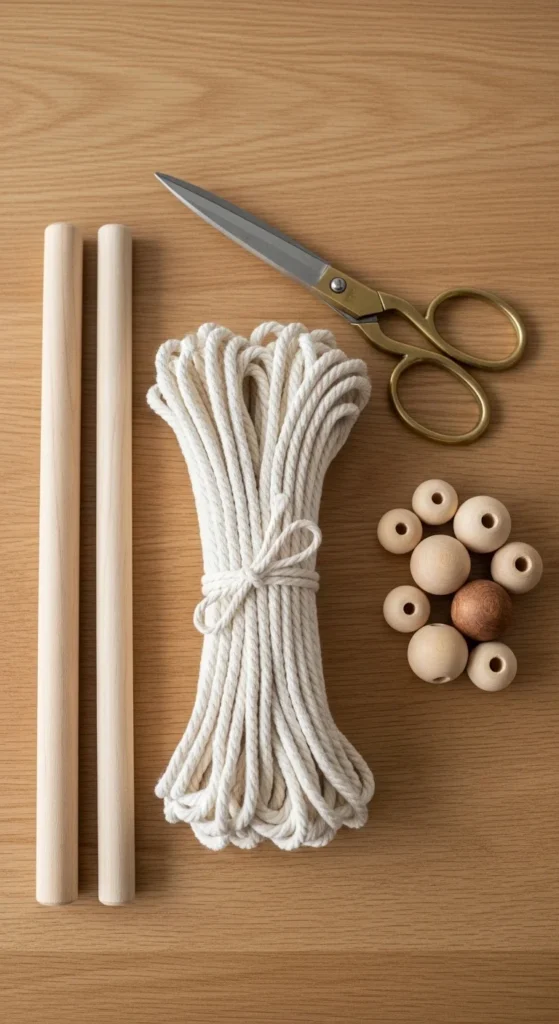
Tip: Start small. A mini wall hanging or keychain is perfect for your first project.
Learning the Basic Knots
Macrame is all about knots. Once you master the basics, you can mix and match patterns endlessly. Here are three beginner-friendly knots:
- Lark’s Head Knot
- Fold your cord in half, loop it around your dowel, and pull the ends through the loop.
- Great for attaching cords to your base.
- Square Knot
- Divide your cord into four strands. Cross the outer strands over the inner strands to form a square.
- Versatile and used in most patterns.
- Half Hitch Knot
- Wrap a cord around a base cord and pull through to create a simple spiral or diagonal line.
- Ideal for adding texture and dimension.
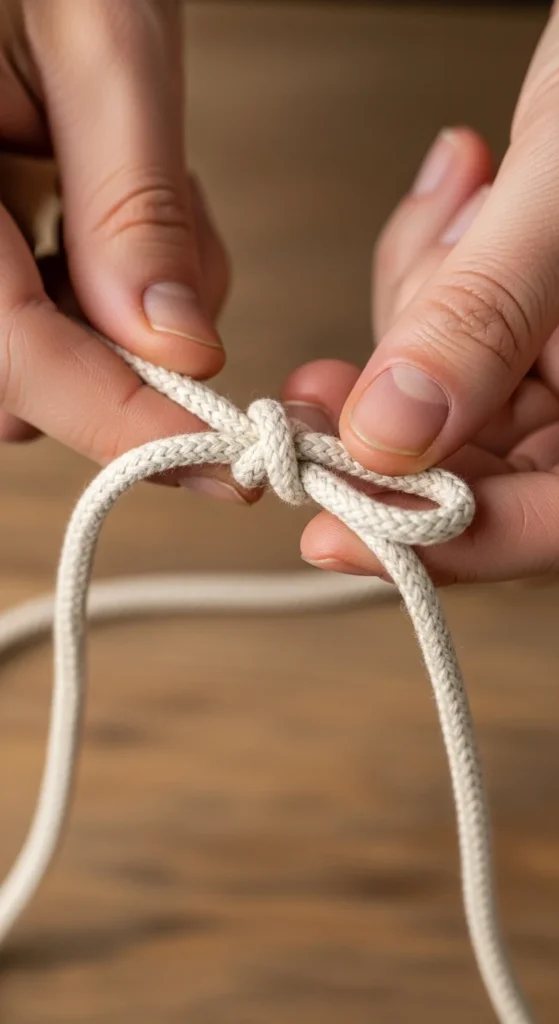
Tip: Practice these knots on scrap cord before starting your main project. Muscle memory makes a huge difference!
Step-by-Step Beginner Project: Mini Wall Hanging
Ready to make your first piece? A mini wall hanging is the perfect beginner project. Here’s how:
Step 1: Prepare Your Cords
- Cut four cords, each about 4–5 feet long.
- Attach them to a 12-inch wooden dowel using the Lark’s Head Knot.
Step 2: Make the Base Row
- Create a row of square knots across all cords.
- Keep tension even to avoid uneven loops.
Step 3: Add Texture
- Use Half Hitch Knots to create diagonal patterns.
- Mix in a few beads if you like a boho touch.
Step 4: Trim and Finish
- Trim the ends to your desired length.
- Comb out the ends with your fingers for a soft, fringed look.

Tip: Don’t stress about perfection—handmade charm comes from small imperfections.
Extra Tips for Success
- Measure Twice, Cut Once: Cords can shrink slightly after knotting, so leave extra length.
- Keep it Tidy: Smooth out knots as you go to prevent tangling.
- Experiment with Patterns: Once comfortable, mix knots to create your own designs.
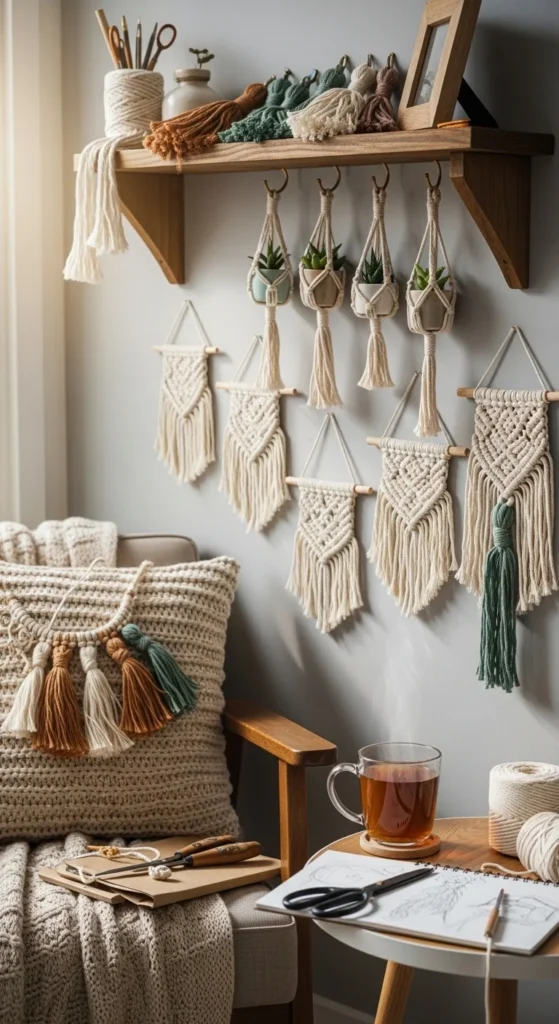
- Use Natural Materials: Cotton, jute, and wooden beads complement each other beautifully.
- Display Creatively: Wall hangings, plant hangers, curtain tiebacks—the possibilities are endless.
Wrapping Up
DIY macrame is not only a creative outlet—it’s a way to personalize your space with love and care. Start small, practice your knots, and slowly expand to more intricate projects. Over time, you’ll gain confidence, and your home will be filled with unique handmade touches that are 100% you.
So grab your cord and dowel, and start your macrame journey today. Your walls (and your inner artist) will thank you!
Save this guide for later and make your home a little more handmade and a lot more beautiful!

Leave a Reply