
Summer is the perfect season to get creative! Whether you’re lounging on the porch, spending time with friends, or keeping kids entertained, DIY crafts are a fun way to add color and personality to your sunny days. From vibrant decorations to simple home projects, there’s something for everyone to enjoy.

In this guide, we’ll explore easy, Pinterest-worthy DIY crafts that you can make with things you probably already have at home. Let’s dive in!
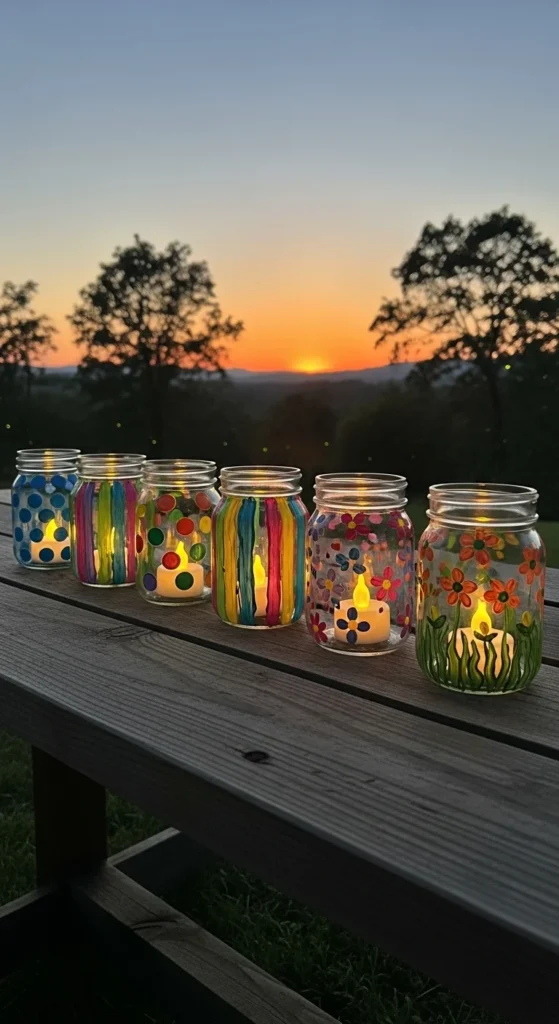
1. Colorful Mason Jar Lanterns
Mason jar lanterns are a classic summer craft. They’re perfect for outdoor evenings or adding a cozy glow to your room.
Materials Needed:
- Mason jars
- Acrylic paint or glass paint
- Tea light candles (battery-operated for safety)
- Twine or ribbon for decoration
Steps:
- Paint the outside of the mason jar with your favorite colors. Ombre or rainbow designs work beautifully in summer.
- Once dry, place a tea light inside.
- Wrap twine or ribbon around the top of the jar for a rustic touch.
- Line them up along your patio or windowsill for an instant summer glow.
Tips:
- Try using glow-in-the-dark paint for a magical effect at night.
- You can also glue small seashells around the rim for a beachy vibe.
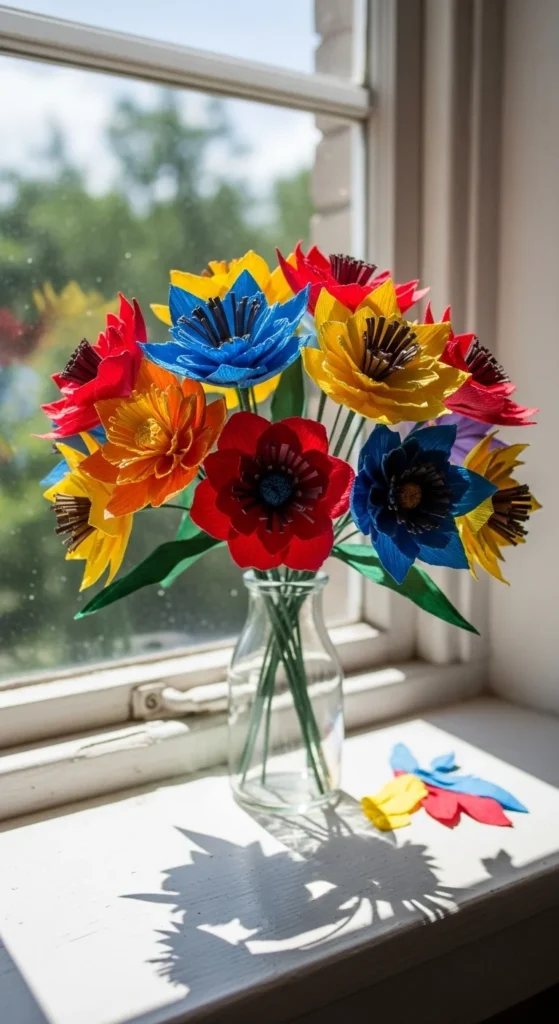
2. DIY Paper Flower Bouquet
Bring summer blooms indoors with a paper flower bouquet. These last forever and are surprisingly easy to make.
Materials Needed:
- Colored craft paper
- Scissors
- Glue or double-sided tape
- Green floral wire or pipe cleaners
Steps:
- Cut petal shapes from your colored paper. You can mix sizes for a more realistic look.
- Roll or fold each petal slightly to give them dimension.
- Attach petals around a floral wire or pipe cleaner to form a flower.
- Repeat and arrange your flowers in a jar or vase.
Tips:
- Use pastel colors for a soft, summery look.
- Mix paper types like cardstock and tissue paper for texture.
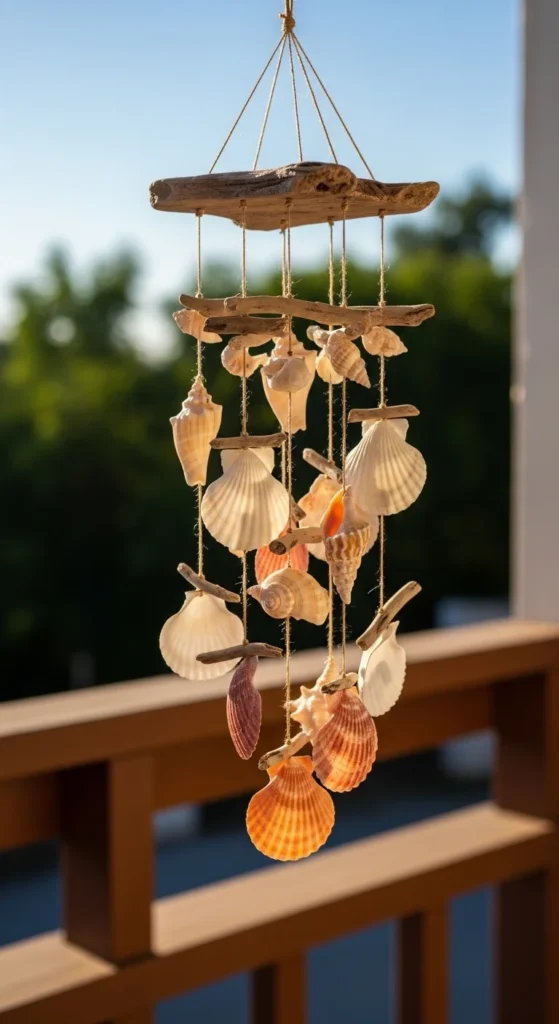
3. Seashell Wind Chimes
If you’ve collected seashells from the beach, turn them into charming wind chimes! This craft is perfect for patios, balconies, or gardens.
Materials Needed:
- Collected seashells
- Fishing line or strong thread
- Driftwood or a small wooden hoop
- Drill (optional, for threading holes in shells)
Steps:
- Drill small holes in each shell, if needed.
- Cut different lengths of fishing line and thread shells onto them.
- Tie the lines to your piece of driftwood or hoop.
- Hang your wind chime where it can catch the breeze.
Tips:
- Add small beads or colorful buttons between shells for extra flair.
- Paint the driftwood for a pop of color or leave natural for a coastal feel.
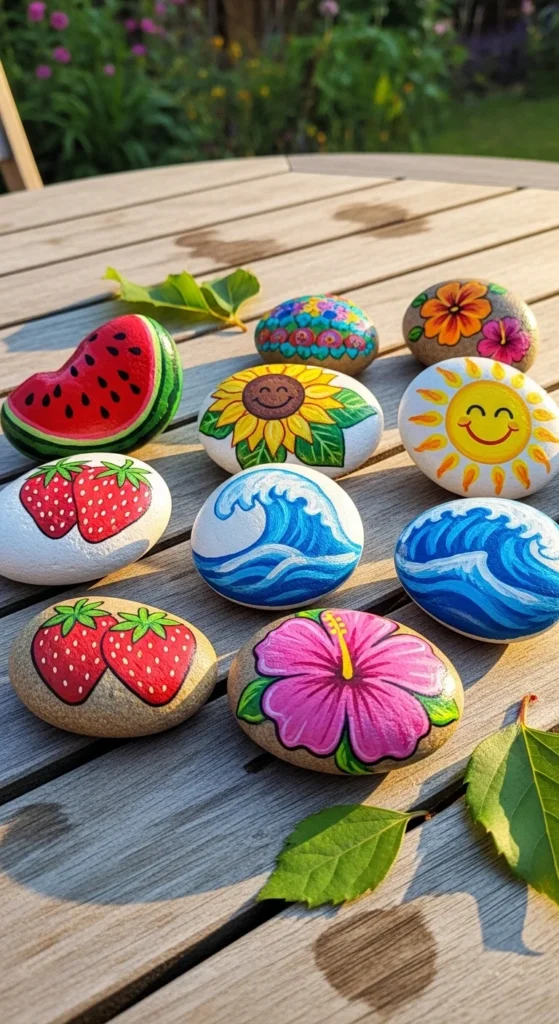
4. Summer-Themed Painted Rocks
Painted rocks are an easy and satisfying DIY project. Use them as garden decorations, paperweights, or cute gifts.
Materials Needed:
- Smooth river rocks
- Acrylic paint and brushes
- Clear sealant spray
Steps:
- Wash and dry your rocks to ensure paint sticks well.
- Paint summer designs like sunflowers, watermelon slices, or flamingos.
- Let the paint dry completely and spray with a sealant to protect it outdoors.
Tips:
- Use fine-tip brushes for details like tiny flowers or patterns.
- Leave some rocks with motivational words like “Smile” or “Enjoy Summer.”
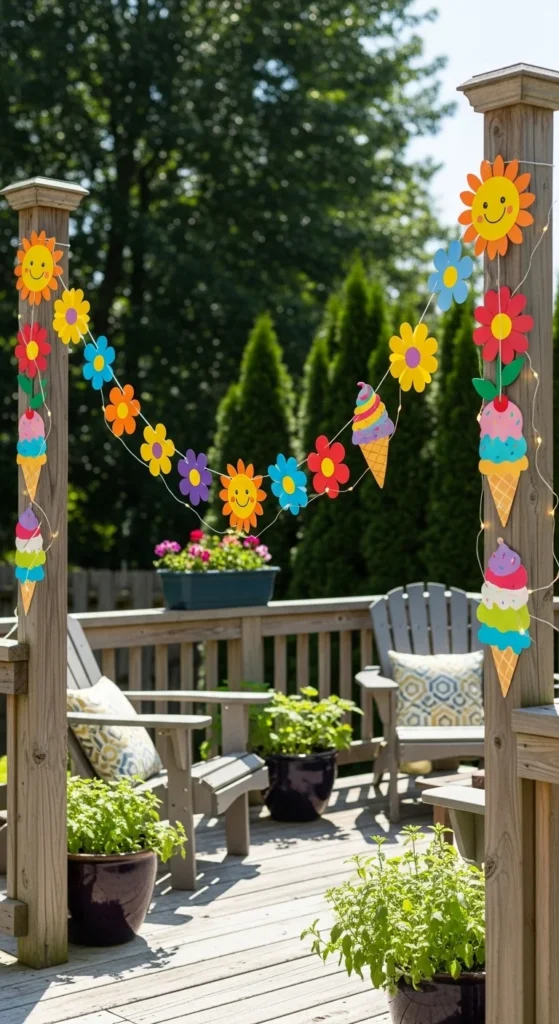
5. DIY Summer Garland
Decorate your room, porch, or party space with a cheerful summer garland. This craft is versatile and allows you to customize your colors and shapes.
Materials Needed:
- Colored paper, felt, or fabric scraps
- String or twine
- Glue, tape, or a sewing machine
- Scissors
Steps:
- Cut out shapes like suns, ice cream cones, or flowers.
- Attach shapes along a string with glue or small stitches.
- Hang your garland wherever you want a splash of summer fun.
Tips:
- Layer shapes for a 3D effect.
- Mix textures like fabric and paper for a boho vibe.
Summer DIY crafts are all about having fun, expressing your creativity, and adding a personal touch to your space. Whether you’re crafting solo, with friends, or with kids, these projects are simple, affordable, and full of sunny charm.
Pro Tip: Keep a dedicated summer craft box with supplies ready—you’ll always have something fun to create!
Save this guide and start your summer crafting adventure today!

Leave a Reply