
Looking to add charm, functionality, and personality to your walls without spending a fortune? DIY wall shelves are your new best friend. They’re practical, stylish, and—best of all—you can make them yourself with minimal tools and materials. Whether you’re aiming for a rustic farmhouse vibe, a sleek modern look, or a cozy boho touch, creating your own shelves is easier than you think.
Why DIY Wall Shelves Are a Game-Changer
Wall shelves are more than just storage—they’re statement pieces. Here’s why making your own is worth the effort:
- Customizable: Choose the wood, paint, or finish that fits your style.
- Budget-friendly: Store-bought shelves can be pricey, but DIY options are often cheaper.
- Satisfying project: Nothing beats the pride of seeing your creation on display.
- Functional: Perfect for small spaces or awkward corners.
With just a few simple steps, you can transform any wall into a stylish focal point.
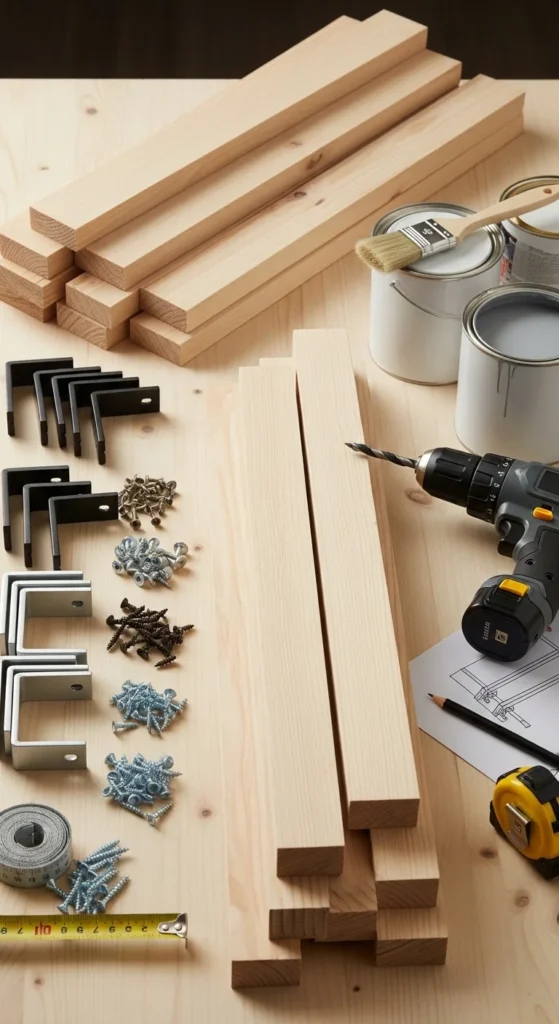
Materials You’ll Need
Before diving into building, gather your essentials. Most of these items are easy to find at hardware stores or online.
- Wooden boards (plywood, reclaimed wood, or pine work well)
- Wall brackets or floating shelf hardware
- Screws and wall anchors
- Sandpaper (medium and fine grit)
- Paint, stain, or wood finish
- Drill and screwdriver
- Level and measuring tape
- Optional: Decorative brackets for a vintage or industrial look
Step 1: Plan Your Shelf Layout
Before cutting or drilling, sketch your design. Consider:
- Length and width: Measure your wall and decide the shelf size.
- Spacing: Leave enough room for decor or books. A common spacing is 12–18 inches between shelves.
- Style: Floating shelves, bracket-supported shelves, or geometric arrangements?
Tip: Mark the spots lightly on your wall with a pencil to visualize placement before drilling.
Step 2: Prepare the Wood
Smooth, sand, and finish your boards before installation:
- Sand the edges and surfaces to remove rough spots.
- Apply paint or stain in a well-ventilated area. Two coats usually give the best result.
- Let dry completely—this avoids smudges during installation.

Tip: Using a clear wood sealant adds durability, especially in humid areas like kitchens or bathrooms.
Step 3: Install the Brackets or Floating Hardware
The key to sturdy shelves is secure mounting:
- Find studs: Use a stud finder to ensure the brackets are anchored safely.
- Mark holes: Measure and mark where each bracket will go.
- Drill pilot holes to make screws easier to insert.
- Attach brackets: Use screws and wall anchors as needed.
- Check level: Place a level on top to ensure your shelf will sit straight.
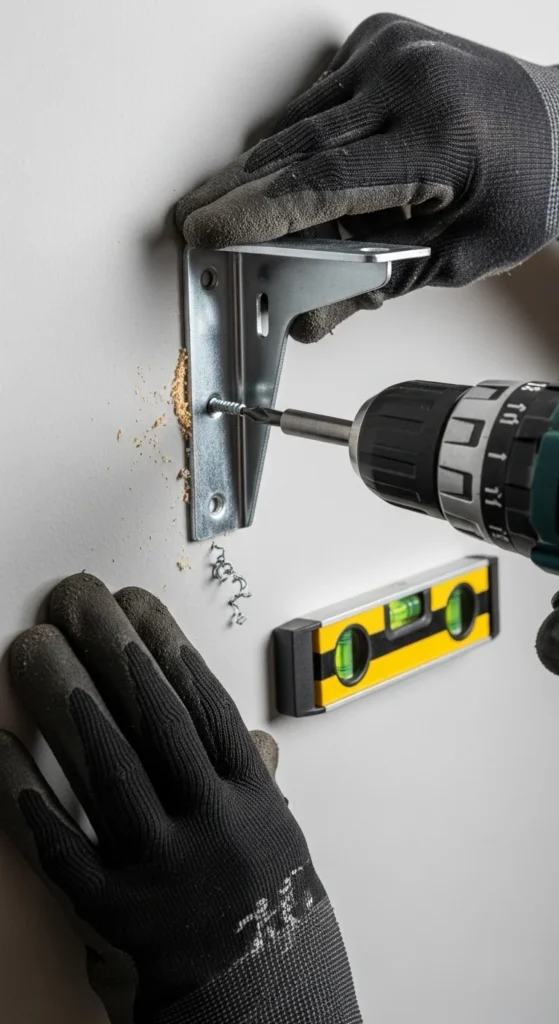
Tip: Floating shelves require careful alignment of the mounting hardware, so double-check measurements before securing the boards.
Step 4: Mount the Shelves
Now for the exciting part—seeing your shelves take shape:
- Place the board on the brackets or hardware.
- Secure the board with screws if your bracket has holes for added stability.
- Double-check the level one last time.
- Add wall anchors if the shelf will carry heavier items.
Tip: Keep heavier items closer to the wall to reduce strain on brackets.
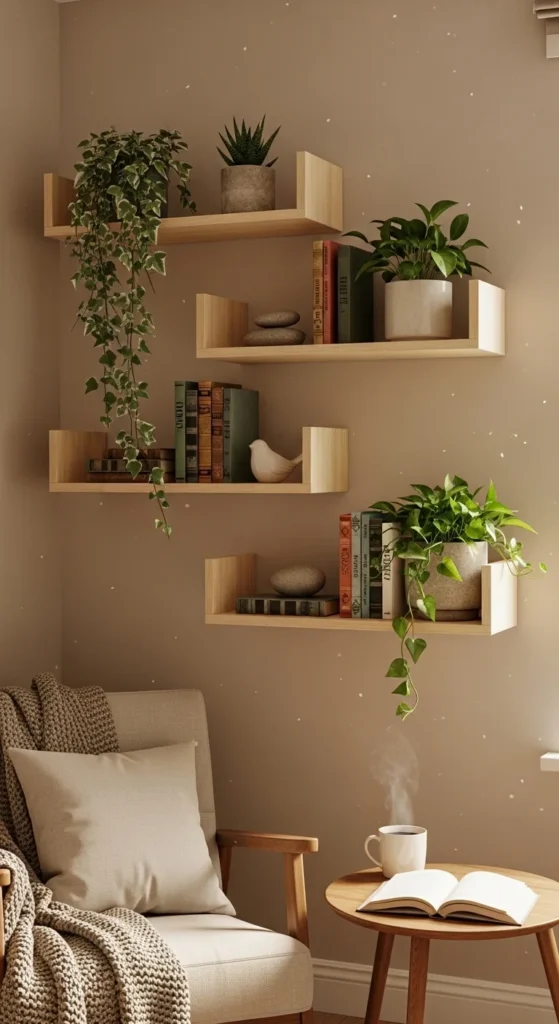
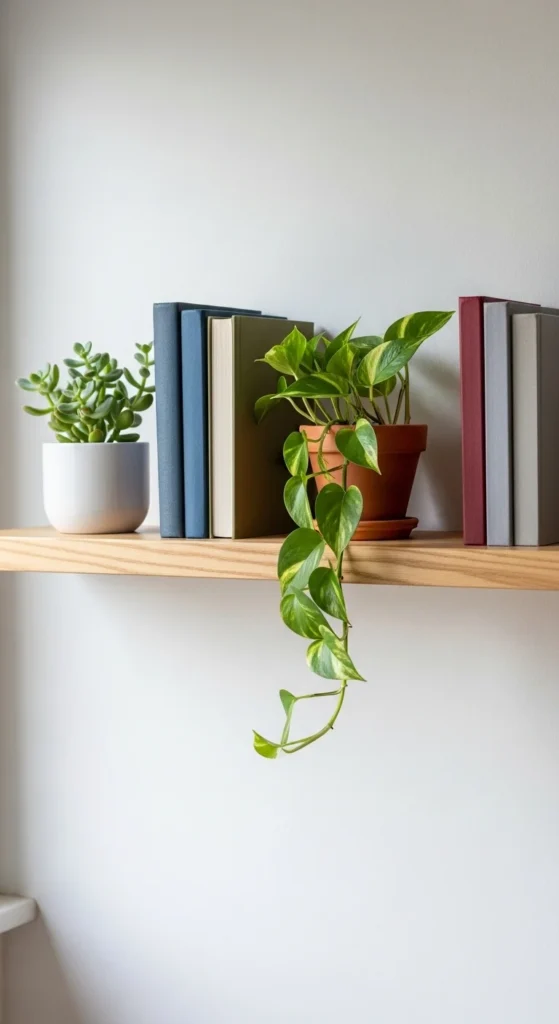
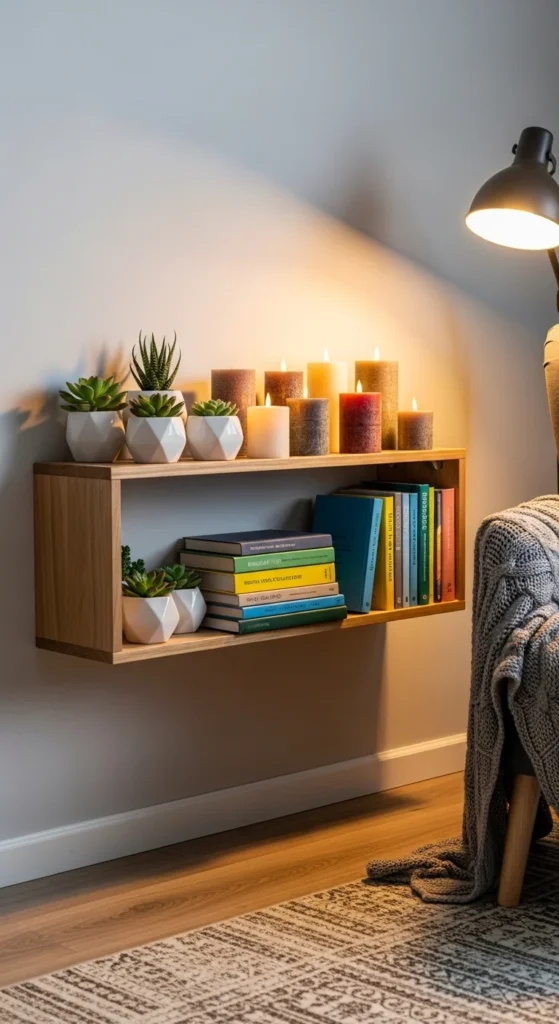
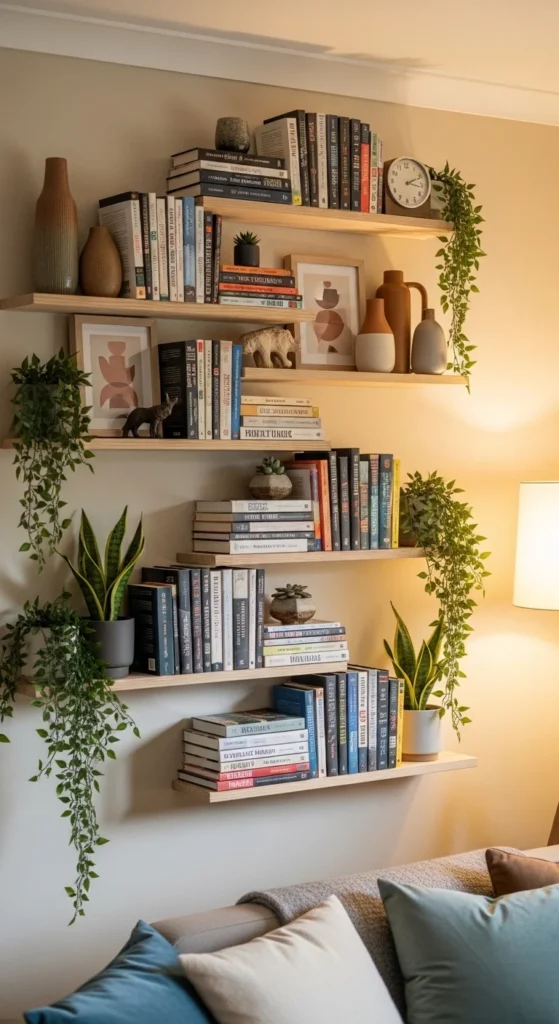
Step 5: Style Your Shelves
Once your shelves are up, it’s time to decorate:
- Mix books, plants, and small decor items for visual interest.
- Use varying heights to add dimension.
- Consider personal touches like framed photos or handmade art.
- Rotate items seasonally for a fresh look.
Quick Tips for Long-Lasting Shelves
- Avoid overloading the shelf beyond its weight capacity.
- Dust and clean regularly to maintain the finish.
- If using reclaimed wood, inspect for cracks or nails before mounting.
- Experiment with paint and textures for a unique vibe.
Final Thoughts
DIY wall shelves are a simple, rewarding way to elevate any space. From cozy reading nooks to functional kitchen storage, your creativity is the limit. Gather your materials, follow these steps, and you’ll have stylish, sturdy shelves ready to display your favorite items.
Save this guide for later and start planning your dream shelves today—you’ll be amazed at the difference a few simple boards can make!

Leave a Reply