
Creating your own wreath is a fun and creative way to add a personal touch to your home décor for any season. Whether it’s for a festive holiday or just a cute seasonal touch, making a DIY wreath allows you to customize it to fit your style, color scheme, and preferences. Plus, it’s a great craft to do alone or with family and friends. Let’s dive into the steps, tips, and ideas for crafting beautiful wreaths that will make any door or wall look amazing!
Materials You’ll Need
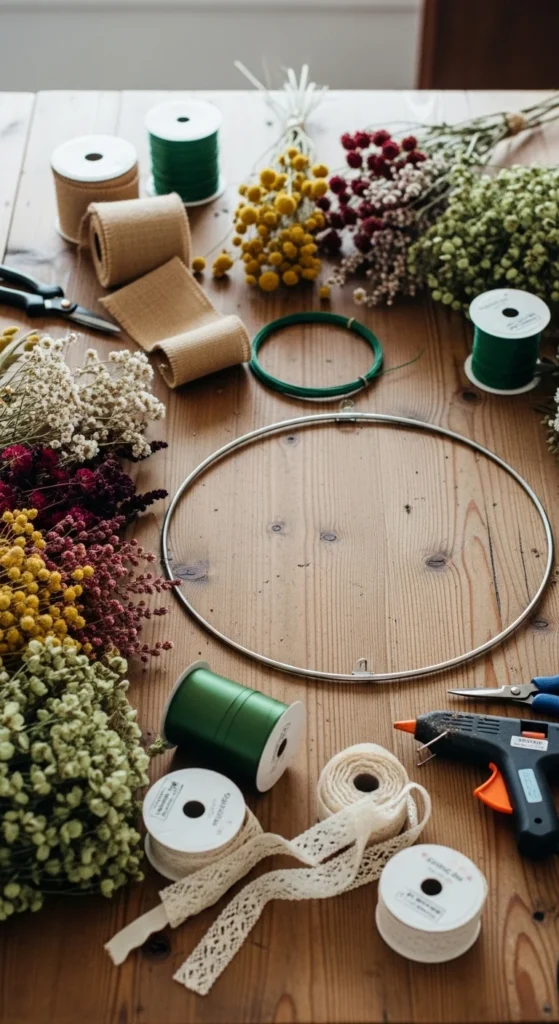
Before diving into the actual crafting, make sure you have the right materials. The good news is that most wreath-making supplies are affordable and easy to find at your local craft store. Here’s a basic list:
- Wreath frame (wire or foam)
- Floral wire or hot glue gun for securing elements
- Ribbons in various colors and textures
- Artificial flowers (seasonal ones like sunflowers for summer, pinecones for winter, etc.)
- Seasonal accents like berries, leaves, or small ornaments
- Scissors and floral shears for cutting and trimming
- A bow for a decorative finish (optional)
Once you’ve gathered all your materials, it’s time to start crafting your wreath!
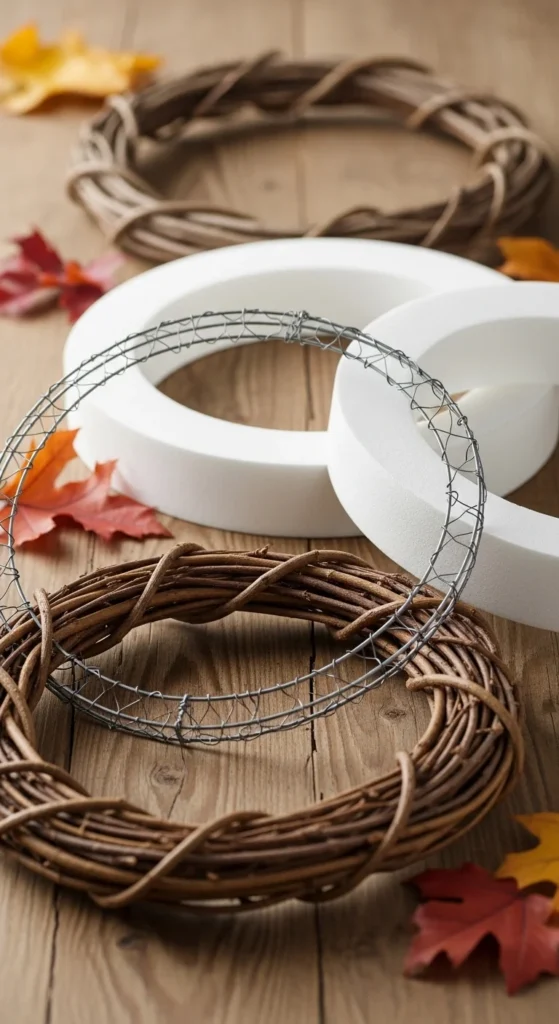
Step 1: Choosing Your Frame
The first step in making any wreath is choosing the right frame. There are several options available:
- Wire frames: These are flexible, lightweight, and can be bent into different shapes.
- Foam wreaths: Ideal for pinning or gluing artificial flowers, they’re solid and provide a sturdy base.
- Branch wreaths: These give a rustic, natural look and are perfect for a simple, woodsy wreath.
No matter which type of frame you choose, ensure it’s the right size for where you want to hang it. Typically, an 18-inch wreath frame works well for doors, but feel free to go bigger or smaller based on your preference.
Step 2: Planning the Design
When creating your wreath, consider the season and the colors you want to use. Here’s how to think about it:
- Winter: Think frosty! Use silver, white, or blue accents. Add pinecones, faux snow, and maybe a few metallic elements for extra sparkle.
- Spring: Fresh and floral! Pastel ribbons, spring flowers like tulips or daisies, and greenery will create a refreshing look.
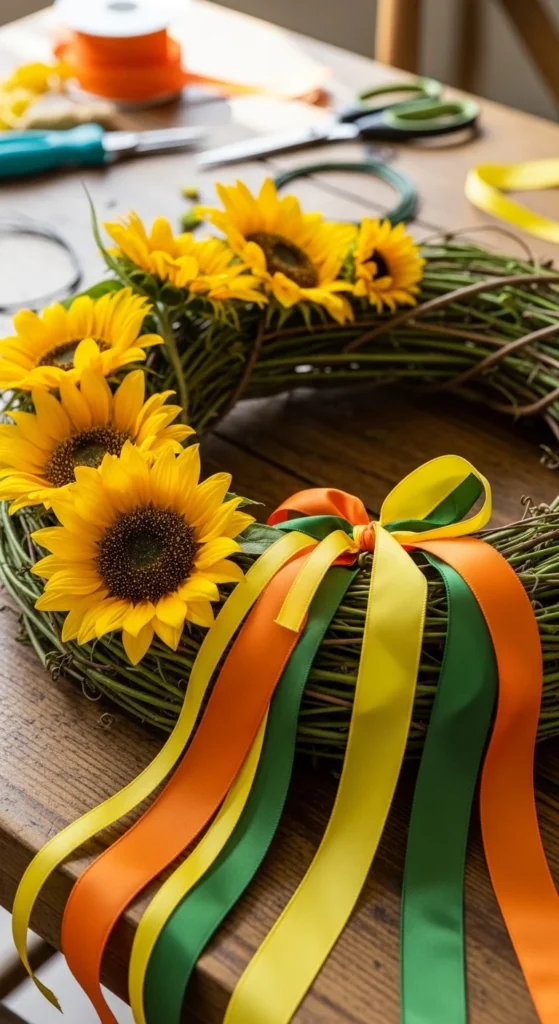
- Summer: Go bright! Bold colors like yellows, reds, and oranges paired with sunflowers, beach elements like shells or starfish, and maybe even some gingham ribbons.
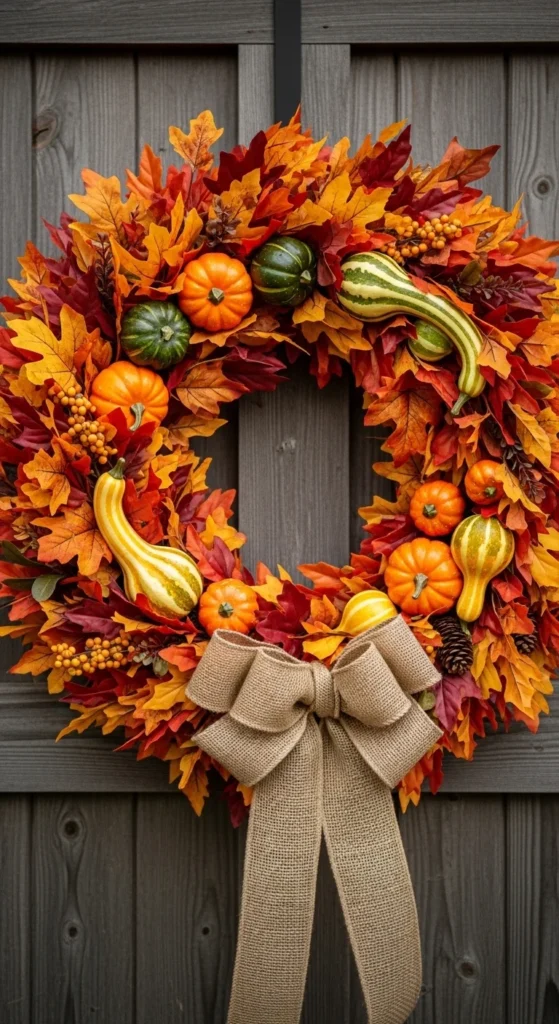
- Fall: Warm tones like burgundy, orange, and brown. Consider using pumpkins, acorns, or autumn leaves.
- Holiday (Christmas): Red, green, and gold are classic. Add pine branches, holly, and small ornaments for a festive vibe.
Tip: You don’t have to stick to just flowers. Consider adding texture with burlap, fabric leaves, or even lights.
Step 3: Attaching the Elements
Now for the fun part—attaching everything to your wreath frame!
- Start with greenery or a base layer: If you’re using faux greenery, begin by attaching it to the frame using floral wire or hot glue. Arrange the greenery around the frame in a natural, flowing way.
- Add flowers and seasonal accents: Once your base layer is in place, begin attaching your flowers and accent pieces. Start with larger elements and fill in with smaller pieces like berries, pinecones, or leaves.
- Secure everything tightly: Use floral wire to wrap the stems of the flowers around the frame, or apply hot glue where necessary. Be sure everything is secure to avoid any pieces falling off over time.
- Decorate the wreath’s outer edges: Add a final flourish around the outer edge with a ribbon or some trailing vines for a soft, whimsical look.
Step 4: Adding the Finishing Touches
No wreath is complete without those final little touches that tie it all together. Consider the following:
- A decorative bow: Use your favorite ribbon to create a bow for the center of your wreath or place it at the top for a hanging effect.
- Personalized details: Add small signs, monograms, or personalized elements like your family name or a fun greeting (“Welcome,” “Happy Holidays”).
- Additional decorations: If it’s a Christmas wreath, add small ornaments, faux berries, or a jingle bell to make it festive!

Step 5: Hanging Your Wreath
Once you’ve finished decorating your wreath, it’s time to hang it. Here’s how you can hang it securely:
- On your front door: A simple wreath hook works perfectly, especially one with a padded design to protect the door from scratches.
- Inside your home: Hang your wreath on a wall, above a mantelpiece, or even on a mirror for a seasonal touch. Use adhesive hooks or ribbons to secure the wreath.
- For outdoor use: Make sure the materials are weather-resistant if you plan on hanging it outside. Additionally, use a sturdy hook or nail to ensure your wreath doesn’t blow away!

Conclusion
DIY wreath-making is a fun, creative, and budget-friendly way to decorate for any season. With just a few materials and a little imagination, you can craft a personalized wreath that will make any space feel warm and inviting. Whether you want to create a welcoming front door wreath, a holiday centerpiece, or something unique for your home’s décor, the possibilities are endless!
Save this idea for your next crafting session and try making a wreath for each season!

Leave a Reply