
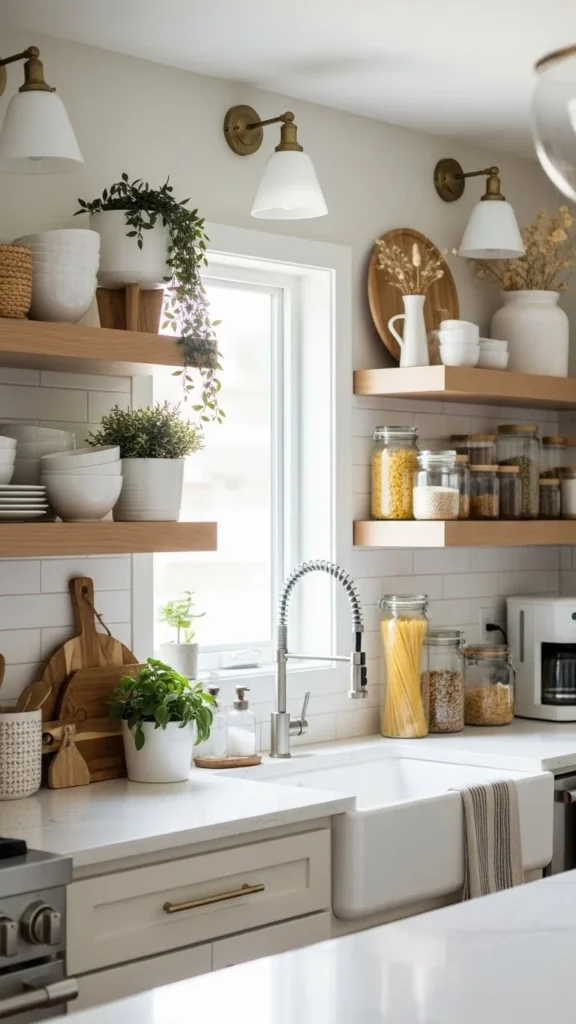
Open kitchen shelves can instantly make a space feel lighter, warmer, and more personal—but only if they’re styled well. Done wrong, they look cluttered and chaotic. Done right, they feel intentional, balanced, and effortlessly stylish. The good news? You don’t need a professional designer to pull it off. With a few smart principles, you can style your kitchen shelves so they look polished and practical.
Start With a Clean, Edited Base
Before decorating, clear everything off your shelves. This reset is key—it helps you see the space as a blank canvas instead of working around clutter.
Ask yourself:
- What do I actually use weekly?
- What’s purely decorative?
- What feels visually heavy or distracting?
Designers almost always edit before styling. Less is more here.
Quick tip: Aim to leave 20–30% of shelf space empty. That breathing room is what makes shelves look intentional instead of crowded.
Build a Simple Color Palette
A cohesive color story is what separates “designer shelves” from random storage. Pick a small palette and stick to it.
Popular, easy palettes:
- White + wood + greenery
- Soft neutrals (cream, beige, light gray)
- Black accents + warm wood
- Earth tones with subtle contrast
Once you choose your palette, repeat those colors across dishes, containers, and decor.
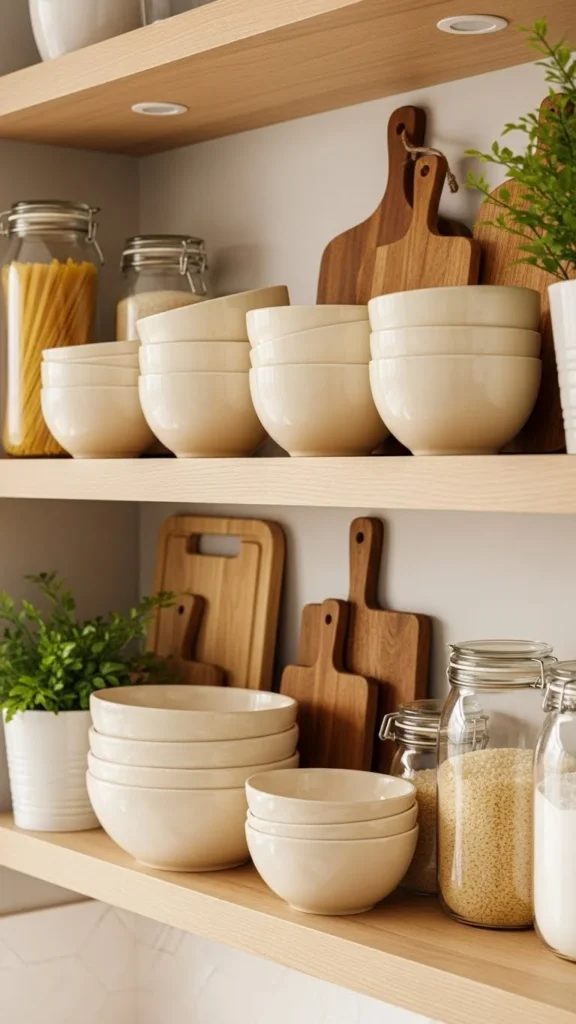
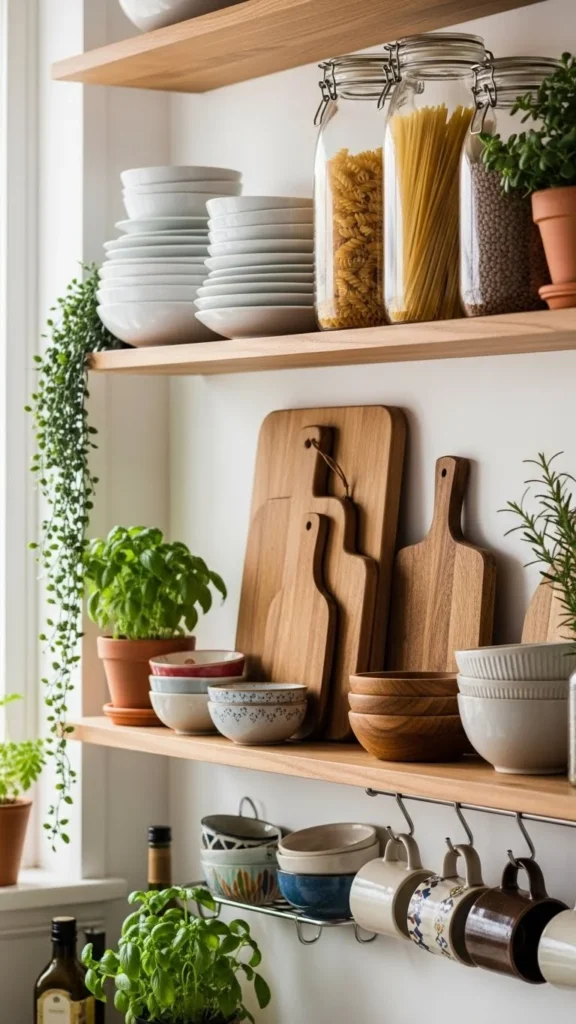
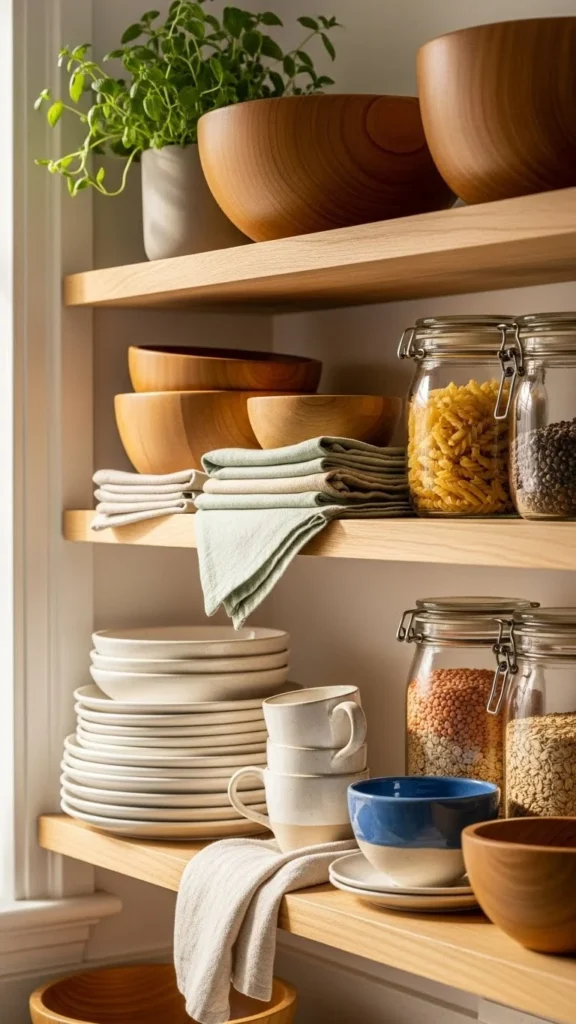
Mix Functional Items With Decor
Designer kitchens always balance beauty and usefulness. Your shelves shouldn’t feel like a showroom—they should work for daily life.
Great functional pieces to display:
- Stacked plates and bowls
- Mugs or cups
- Glass storage jars
- Cutting boards
- Small serving pieces
Decorative accents that elevate the look:
- Small potted plants or herbs
- Ceramic vases
- Cookbooks (2–3 max per shelf)
- Sculptural objects in neutral tones
Rule of thumb: For every purely decorative item, include at least one practical piece nearby.
Vary Heights and Shapes for Visual Interest
One of the biggest mistakes is lining items up at the same height. Designers always play with scale.
How to do it:
- Stack plates horizontally, then stand a cutting board vertically behind them
- Pair a tall jar with a shorter bowl
- Lean one or two items against the backsplash
This layering effect adds depth and keeps shelves from looking flat.
Group Items in Odd Numbers
Styling secret: odd-number groupings look more natural to the eye.
Try:
- Groups of 3 (small bowl, medium jar, tall vase)
- Pairs + one anchor item
- One large piece flanked by two smaller ones
Avoid lining items evenly across the shelf. Instead, create small clusters and leave space between them.
Add Texture for a Designer Feel
Texture is what makes shelves feel warm and lived-in rather than sterile.
Easy ways to add texture:
- Wood (cutting boards, bowls)
- Ceramic (handmade-looking pieces)
- Glass (clear or lightly tinted jars)
- Linen (small folded cloths)
Mixing textures—even in a neutral palette—creates richness without visual clutter.
Keep Everyday Items Within Reach
Designers plan shelves with real-life use in mind. The most-used items should sit on the lower shelves, while decorative or occasional pieces go higher.
A simple layout idea:
- Bottom shelf: plates, bowls, mugs
- Middle shelf: jars, decor, small plants
- Top shelf: less-used items or statement pieces
This keeps your kitchen practical while still looking styled.
Refresh Seasonally (Without Overdoing It)
You don’t need a full makeover every month. Small seasonal tweaks keep shelves feeling fresh.
Easy swaps:
- Add greenery or herbs in spring
- Use warmer textures in cooler months
- Rotate dish colors subtly
Think evolution, not constant change.
Step Back and Adjust
Once you’re done, walk away for a few minutes. When you come back, view the shelves as a whole—not item by item.
Ask:
- Does anything feel crowded?
- Are colors balanced?
- Is there enough empty space?
Tiny adjustments—moving one jar or removing one item—often make the biggest difference.
Final Takeaway
Designer-style kitchen shelves aren’t about buying more things. They’re about editing, balance, and thoughtful placement. Choose a calm color palette, mix function with beauty, play with height and texture, and leave room to breathe.
Once you get the hang of it, styling shelves becomes fun—and surprisingly addictive.
Save this guide for later and give your kitchen shelves a fresh, designer-inspired look this week!

Leave a Reply