
Looking to add a warm, personal touch to your home without splurging on fancy lighting fixtures? DIY lighting decor is the perfect solution. From cozy string lights to elegant mason jar lamps, creating your own lighting can transform any space into a Pinterest-worthy haven. Plus, it’s a fun way to get crafty and show off your creativity.
Whether you’re aiming for a soft ambient glow or a striking statement piece, DIY lighting projects are easier than you think. Here’s your ultimate guide to making stunning lighting decor right at home.
1. Gather Your Supplies
Before diving into any project, it’s important to have all your materials ready. Depending on the type of lighting you want to create, your supply list may vary, but here are some basics:
- LED string lights or fairy lights – energy-efficient and safe for indoor use
- Mason jars, glass bottles, or lanterns – perfect for creating jar lamps
- Copper wire or rope lights – for flexible, sculptural designs
- Hot glue gun or strong adhesive – to secure decorations
- Paints, glitter, or decorative paper – to personalize your lights
- Scissors and wire cutters – handy for crafting and shaping
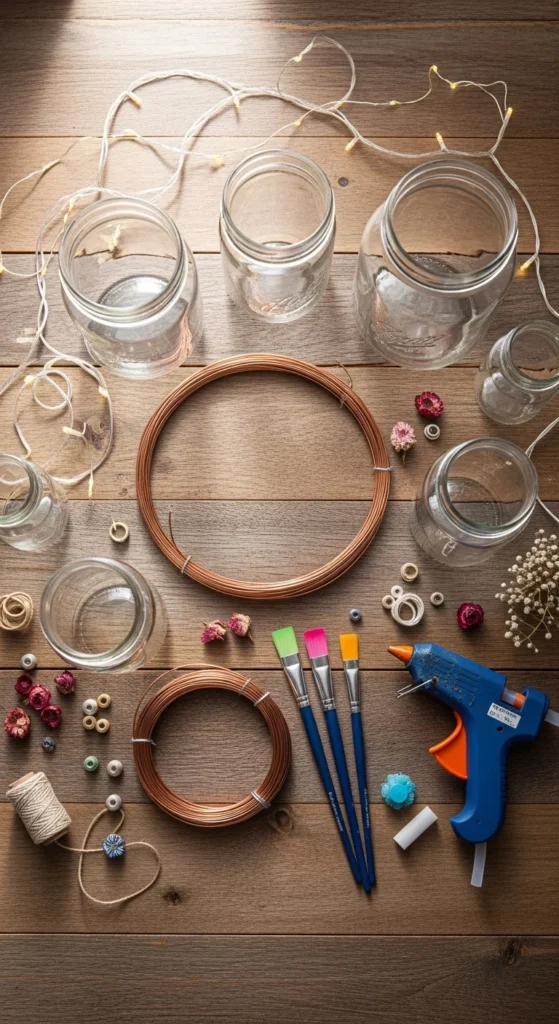
Having these items ready makes the process smooth and enjoyable. Don’t worry if your materials aren’t perfect—DIY is all about creativity and experimentation!
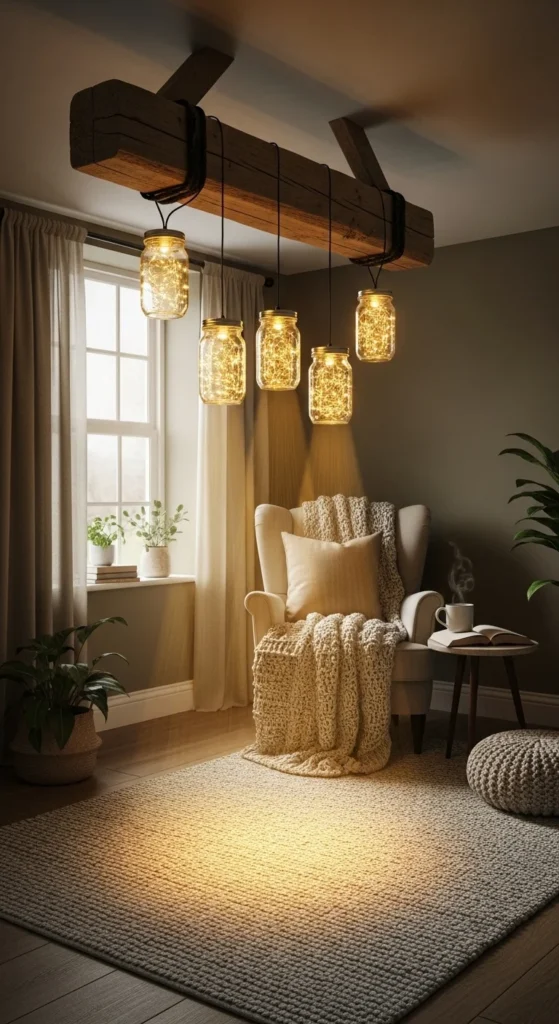
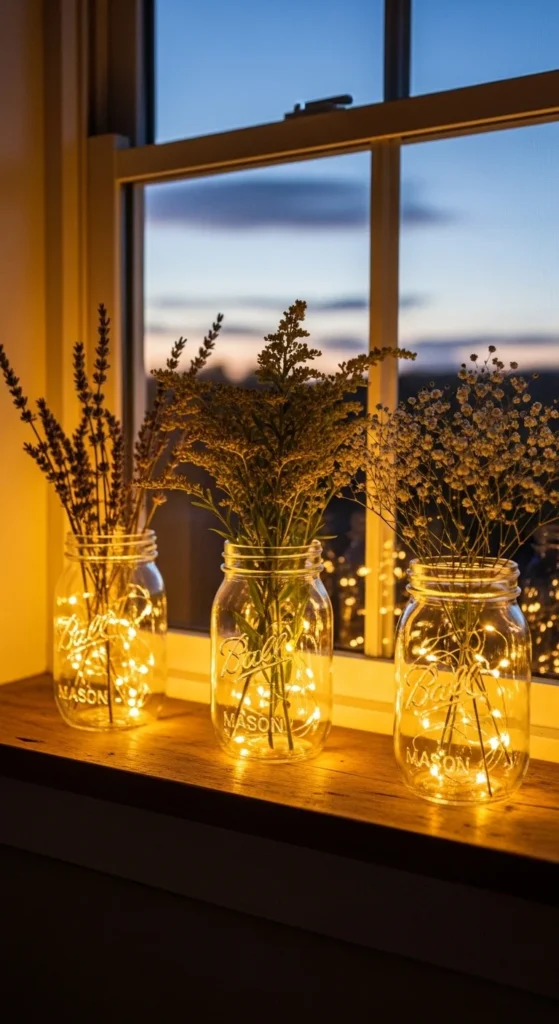
2. Mason Jar Fairy Lights
Mason jar lights are classic DIY decor and add a warm, magical glow to any room. Here’s how to make them:
- Place a string of LED fairy lights inside a mason jar.
- Twist the lid on to secure the lights, leaving some wire trailing if needed.
- Optional: Paint the jar with frosted glass paint or add glitter for a shimmering effect.
- Arrange the jars on a shelf, windowsill, or hang them using twine.
Tips for a professional look:
- Use battery-operated lights for flexibility without cord clutter.
- Layer jars at different heights for a dynamic display.
- Add small decorative elements like dried flowers or pinecones inside the jars.
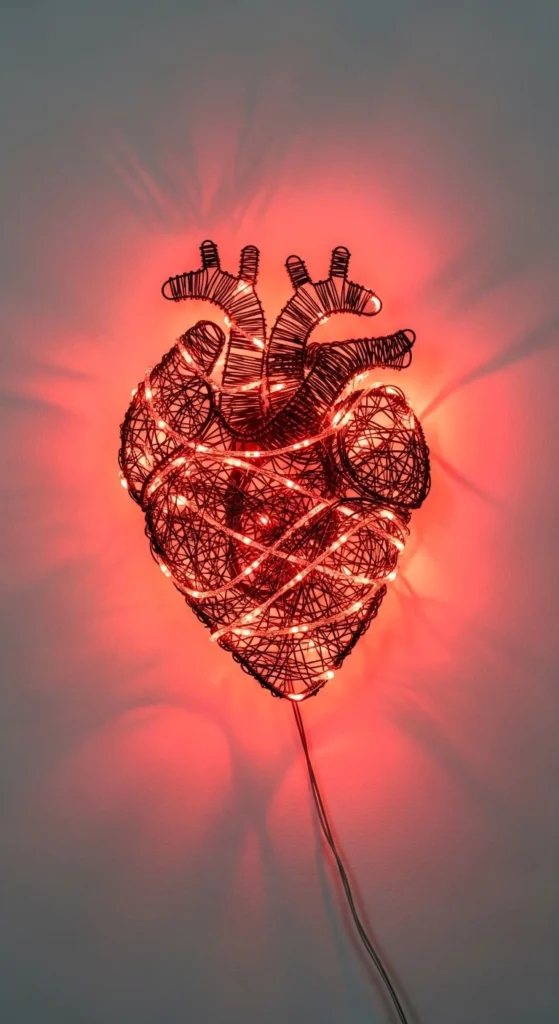
3. Rope and Wire Sculptural Lights
If you want something modern and artistic, try making rope or wire lights. These can be shaped into words, hearts, or abstract forms.
Steps:
- Bend copper wire into your desired shape (e.g., star, heart, or word).
- Wrap the wire carefully with LED rope lights.
- Secure ends with small cable ties or glue.
- Place your design on a wall or hang it from the ceiling.
Tips:
- Keep the shapes simple if you’re a beginner—it’s easier to wrap and looks clean.
- Combine multiple small shapes for a gallery-style lighting effect.
- Use color-changing LED ropes for fun, dynamic displays.
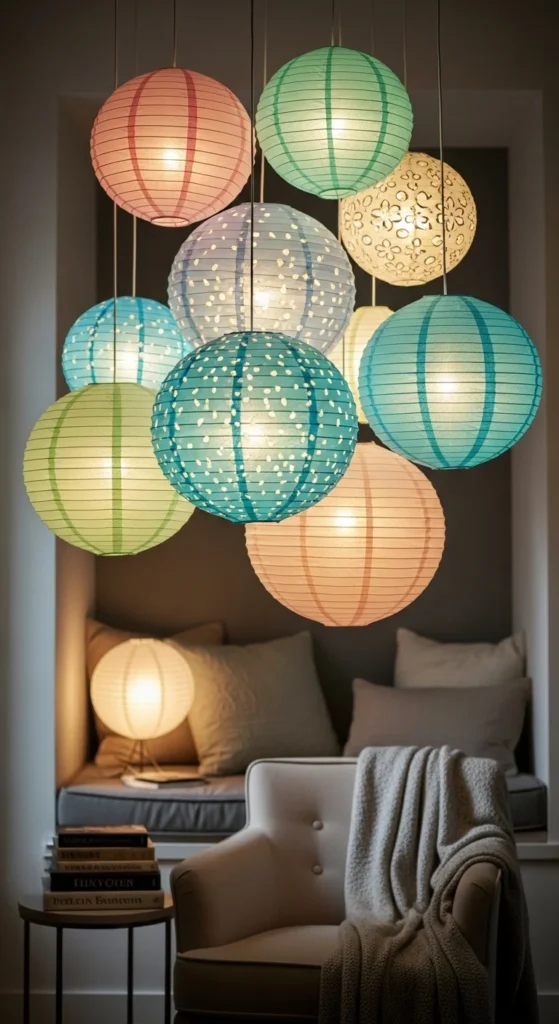
4. Paper Lanterns and DIY Lampshades
Paper lanterns or custom lampshades can instantly elevate your home’s lighting vibe.
How to make them:
- Choose sturdy paper, cardstock, or lightweight fabric.
- Fold or cut designs (e.g., geometric shapes, floral patterns).
- Secure with glue or tape around a basic light fixture or LED bulb.
- Hang them from the ceiling or place over table lamps.
Tips:
- Use LED bulbs only, as they produce less heat and are safer with paper.
- Mix different colors or textures for a playful effect.
- For a boho look, fringe the edges or add tassels.
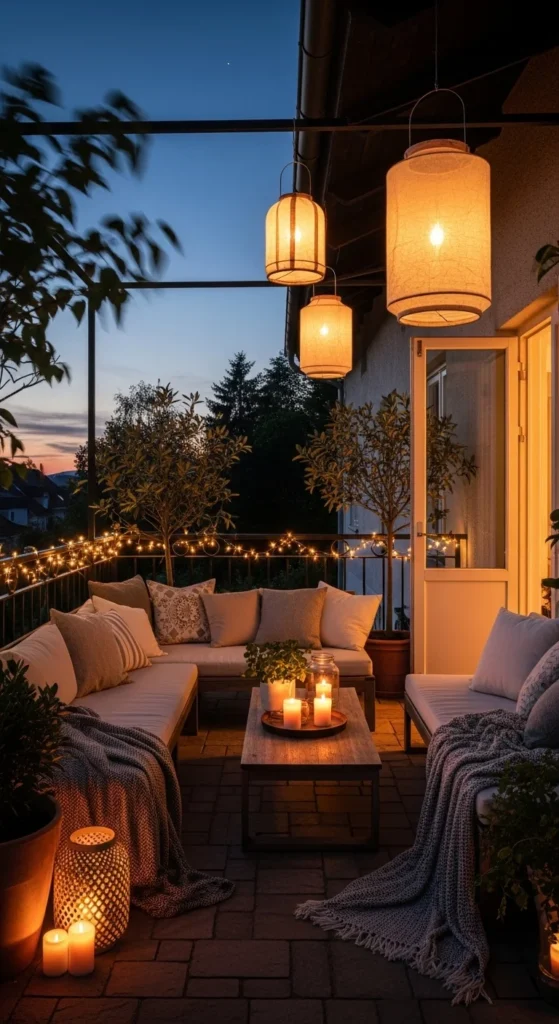
5. Final Touches and Display Ideas
Once your lighting pieces are ready, placement and styling matter. Here are some ideas:
- Create a feature corner: Group different types of DIY lights for a cozy reading or relaxation space.
- Layer lighting: Combine string lights, lamps, and jar lights for depth and warmth.
- Seasonal décor: Swap decorations inside mason jars or lanterns according to holidays or seasons.
- Outdoor use: Make sure lights are rated for outdoor use if you want to illuminate patios or balconies.
DIY lighting decor not only brightens your home but also your creativity! Start small, experiment with materials, and don’t be afraid to get playful with designs. With a little time and imagination, you can transform any space into a glowing masterpiece.
Takeaway: Gather your favorite materials, pick one project to start with, and let your home shine. Save these ideas for later and light up your space in style!

Leave a Reply