
Want to add a personal touch to your space without spending a fortune? DIY photo frames are a fun, creative way to display your favorite memories. Not only do they make your photos pop, but they also double as charming décor pieces. Whether you’re a crafting newbie or a seasoned DIY enthusiast, creating your own frames at home is easier than you think!
Why Make Your Own Photo Frames?
There’s something magical about a handmade frame. Here’s why DIY frames are worth trying:
- Customization: Choose colors, textures, and sizes that match your home or personality.
- Budget-friendly: Save money compared to store-bought frames.
- Creative outlet: Perfect way to unwind and express your artistic side.
- Gift-worthy: Handmade frames make thoughtful presents for friends and family.
Plus, you get the satisfaction of saying, “I made that!” every time you look at your framed photo.
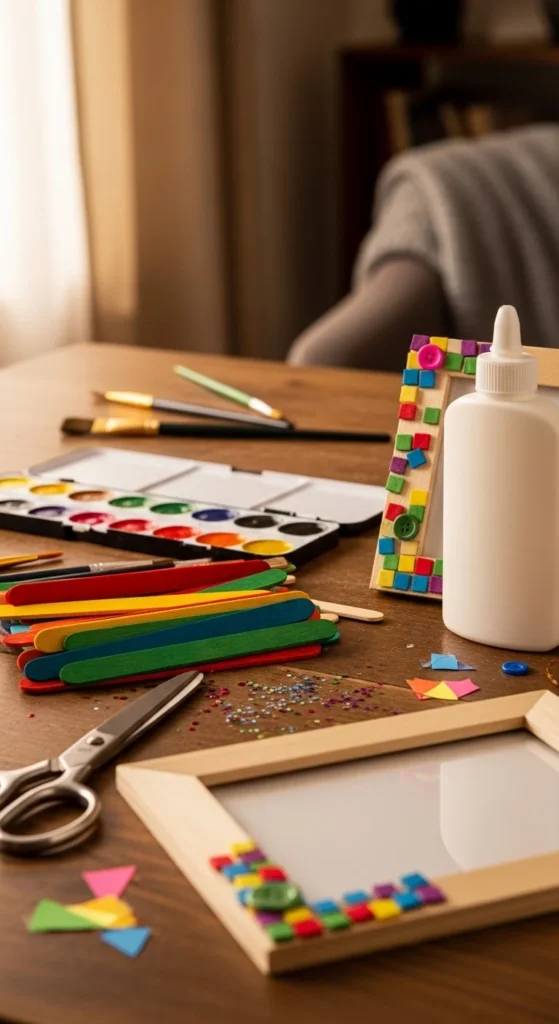
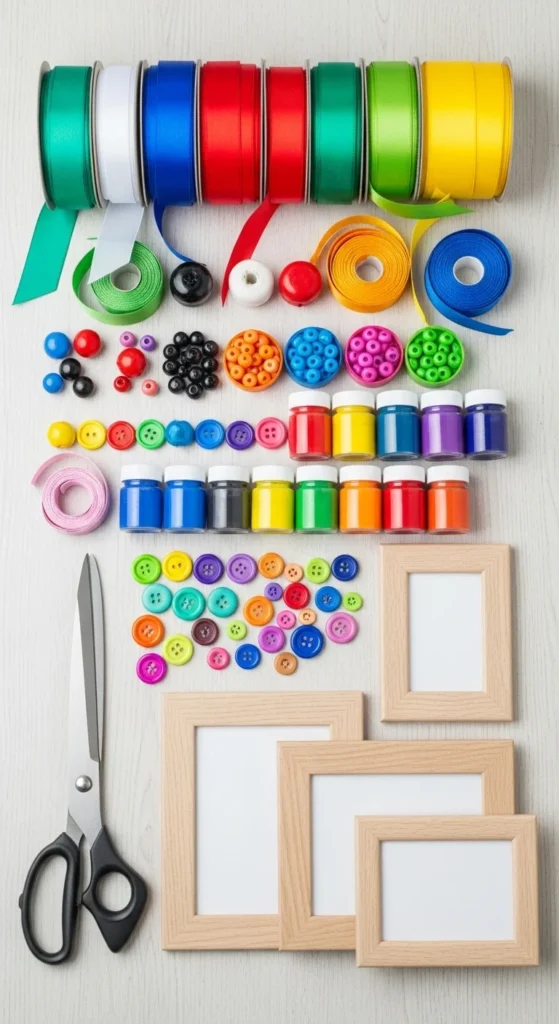
Materials You’ll Need
Before you dive in, gather these basic materials:
- Plain wooden, cardboard, or foam board frames
- Paints, markers, or colored pencils
- Glue gun or strong craft glue
- Decorative items: beads, buttons, ribbons, dried flowers
- Scissors and ruler
- Clear acrylic sheet or glass (optional for covering photos)
Pro tip: Start simple if this is your first frame project, then experiment with textures and layers later.
Step-by-Step DIY Photo Frame Ideas
Here are a few easy ways to make your frames at home. Pick the one that sparks your creativity!
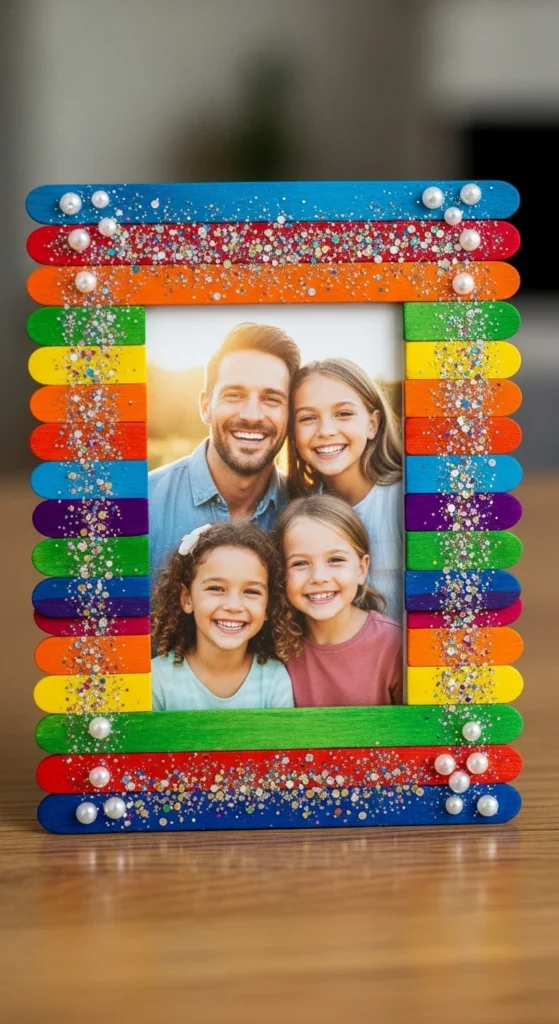
1. Popsicle Stick Frame
A classic favorite, perfect for beginners.
Steps:
- Arrange popsicle sticks into a square or rectangle.
- Glue the sticks together at the corners.
- Paint or decorate the sticks with washi tape, markers, or glitter.
- Insert your photo and secure it with cardboard or tape from the back.
Tip: Layer sticks in patterns for a textured look.
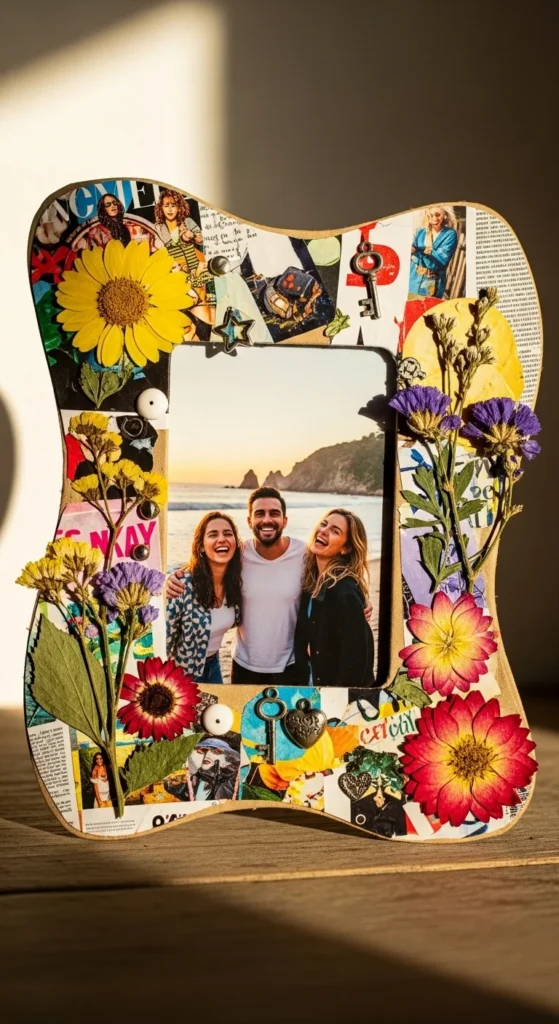
2. Cardboard Collage Frame
Eco-friendly and endlessly customizable.
Steps:
- Cut a cardboard frame to your desired size.
- Decorate the front with patterned paper, fabric, or magazine cutouts.
- Glue on buttons, dried flowers, or small charms.
- Attach your photo with tape or a small clip.
Tip: Use thick cardboard for sturdier frames.
3. Minimalist Wooden Frame
For a clean, modern look.
Steps:
- Sand the edges of a plain wooden frame.
- Paint in neutral or pastel shades.
- Add subtle accents: thin ribbon, a small charm, or a tiny painted design.
- Insert your photo under a glass or acrylic sheet for a polished finish.
Tip: Matte paint gives a soft, Pinterest-worthy aesthetic.

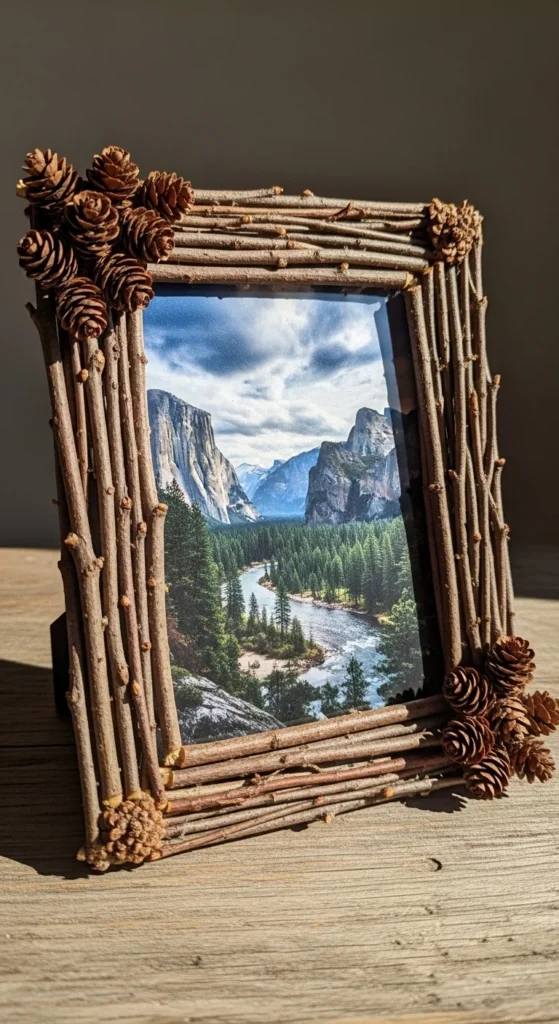
4. Natural Elements Frame
Bring the outdoors inside with natural materials.
Steps:
- Collect small twigs, shells, or pebbles.
- Arrange them on a plain frame and glue them securely.
- Paint or leave natural for an earthy vibe.
- Add your photo and enjoy the rustic charm.
Tip: This works beautifully for vacation photos or nature shots.
Tips for Perfect DIY Frames
- Measure twice: Ensure your photo fits perfectly before decorating.
- Use strong glue: This prevents embellishments from falling off.
- Experiment with layers: Mix textures like fabric, paper, and beads.
- Keep it balanced: Don’t overcrowd the frame; let the photo shine.
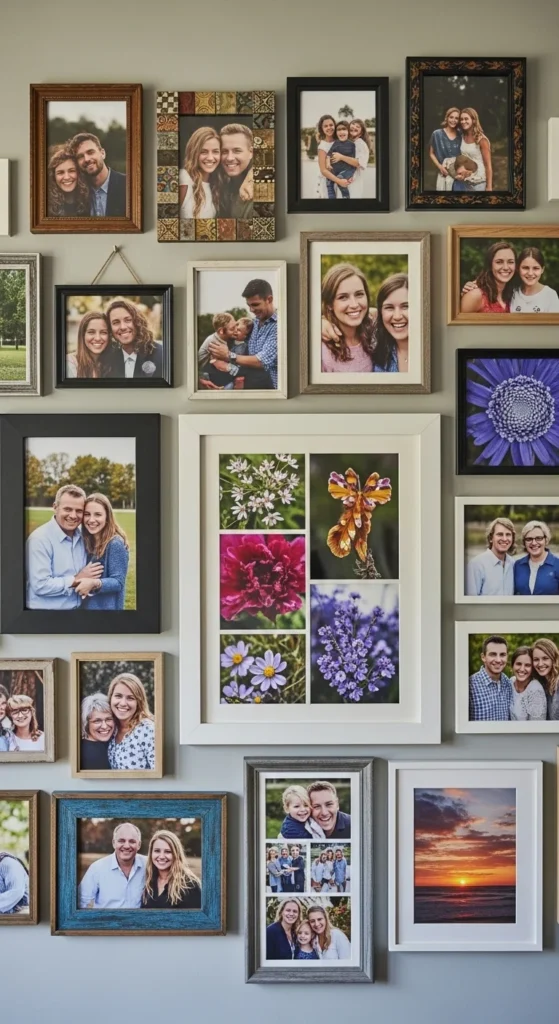
Displaying Your DIY Frames
Once your frame is ready, you can display it creatively:
- Group multiple frames for a gallery wall.
- Place on a mantel, desk, or bedside table.
- Hang using twine, ribbon, or small hooks.
- Mix DIY frames with store-bought ones for a chic eclectic look.
Creating DIY photo frames is not just about crafting—it’s about celebrating memories in a personal, stylish way. Once you start, you’ll want to make a frame for every special photo you have!
Save this guide and try making your own frames this weekend—you’ll be amazed at what you can create with a little glue, creativity, and love.

Leave a Reply